n8n Lead Nurturing Workflow: Automate Follow-Ups for Warm Leads

Following up with potential customers is important, but sending the same message to every prospect can make communication feel impersonal. For small businesses, consultants, and agencies, the challenge is maintaining consistent contact with interested prospects without creating unnecessary manual work.
An n8n lead nurturing workflow can help automate scheduled follow-ups, deliver relevant resources, and maintain a clear record of communication. Instead of focusing on finding or scoring new leads, this workflow begins with an existing warm lead and helps move the relationship forward through useful, timely interactions.
In this guide, you’ll learn how to build a practical nurturing sequence using n8n, a Google Sheets lead tracker, Gmail, and conditional logic. You’ll also learn how to prevent unnecessary emails, handle replies, test the workflow, and maintain appropriate safeguards.
Table of Contents
What Is an n8n Lead Nurturing Workflow?
An n8n lead nurturing workflow is an automated process that maintains communication with prospective customers over time. It uses predefined conditions, waiting periods, and follow-up messages to deliver relevant information at appropriate stages of the buying journey.
For example, a consulting agency might have a prospect who requested information about its services but isn’t ready to schedule a meeting. Rather than repeatedly contacting that prospect manually, the agency can arrange a short sequence of helpful emails containing a relevant guide, an answer to a common question, or an invitation to discuss the prospect’s needs.
The workflow handles timing and recordkeeping; at the same time, the business determines the message, tone, and appropriate next step.
What This Workflow Does
The workflow described in this tutorial is designed to:
- Process existing warm leads that are eligible for follow-up.
- Wait for a specified interval before sending a message.
- Send relevant follow-up emails through Gmail.
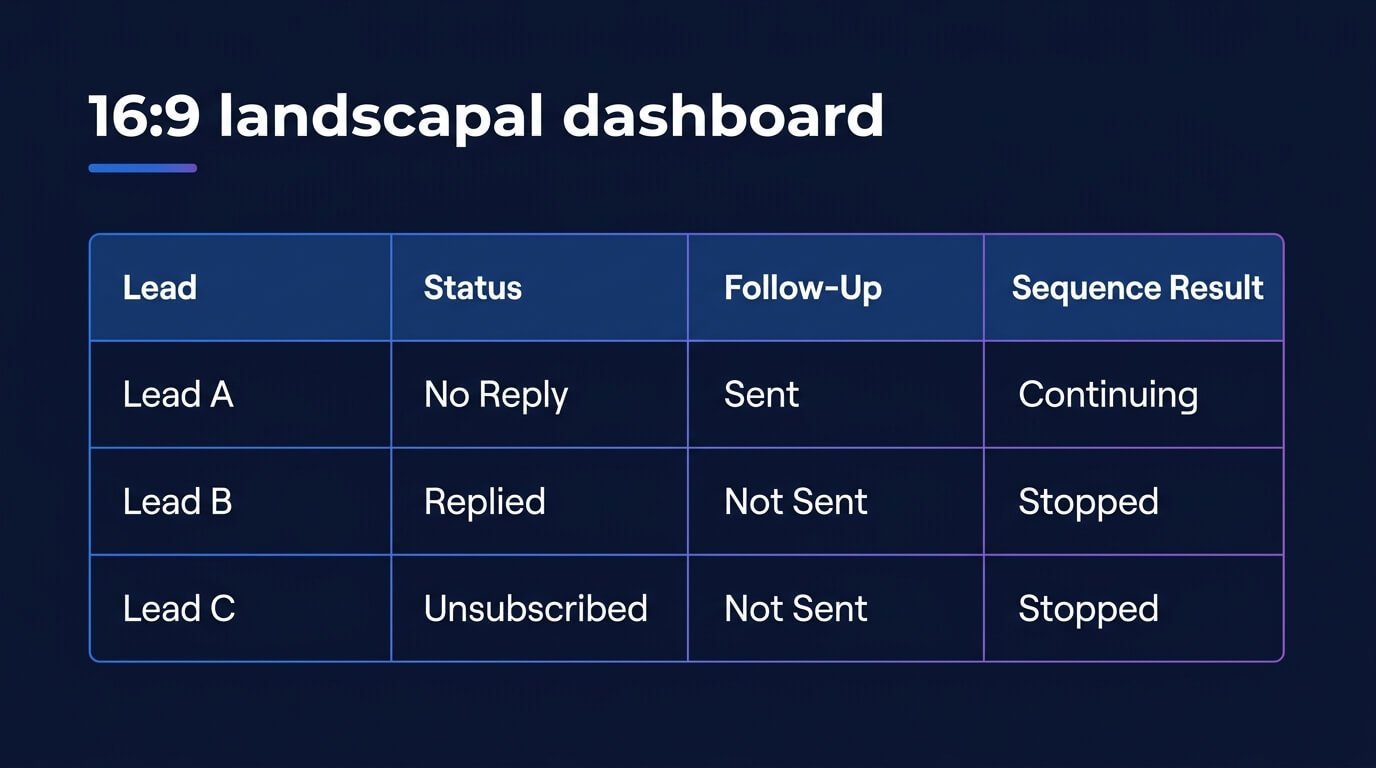
- Check whether a lead has replied or should no longer receive messages.
- Record the message status and next scheduled action.
- Stop the sequence when the lead replies, opts out, or becomes ineligible.
If you need to evaluate prospects before they enter a nurturing sequence, see our guide to automating lead qualification and routing with n8n. This is a focused nurturing system. It does not perform initial lead capture, AI lead scoring, company-data enrichment, or sales-team assignment.
How the Workflow Works
The basic sequence follows a simple process:
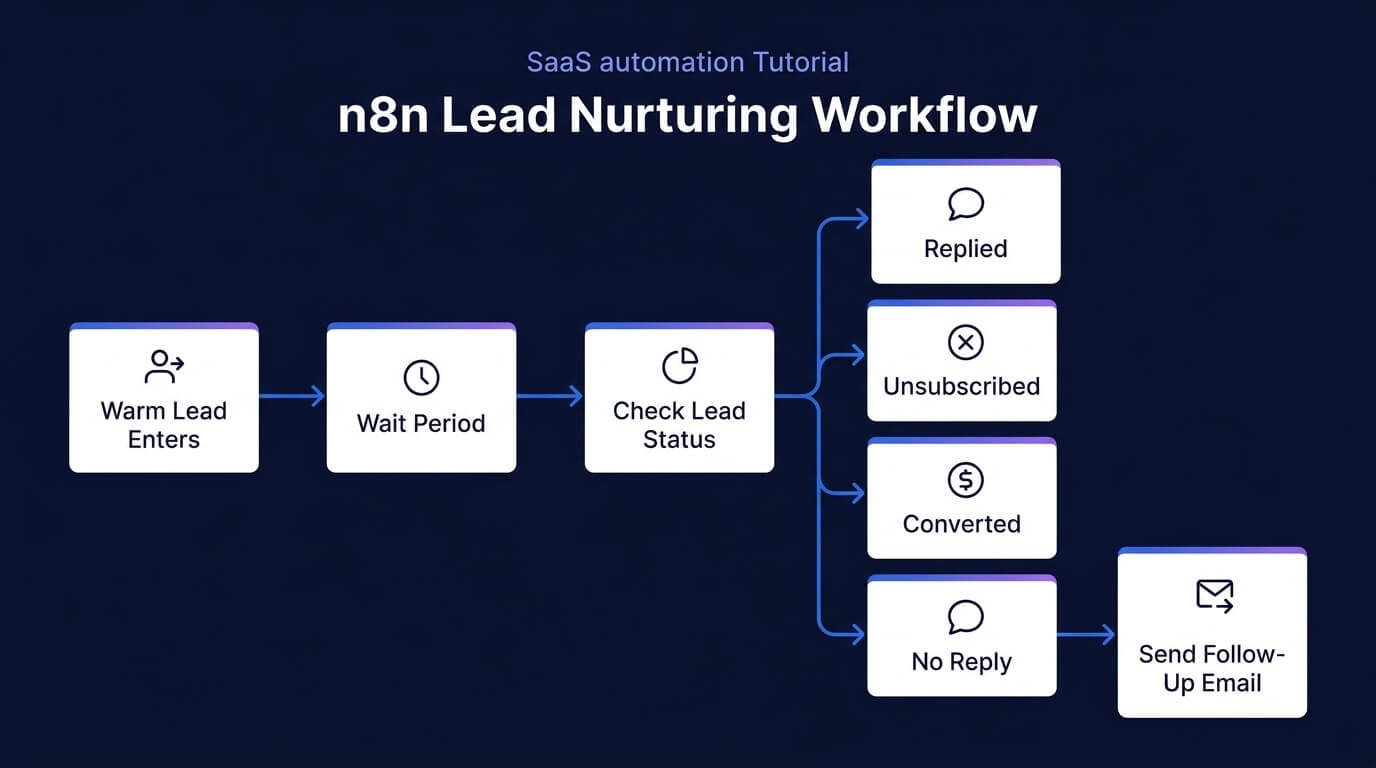
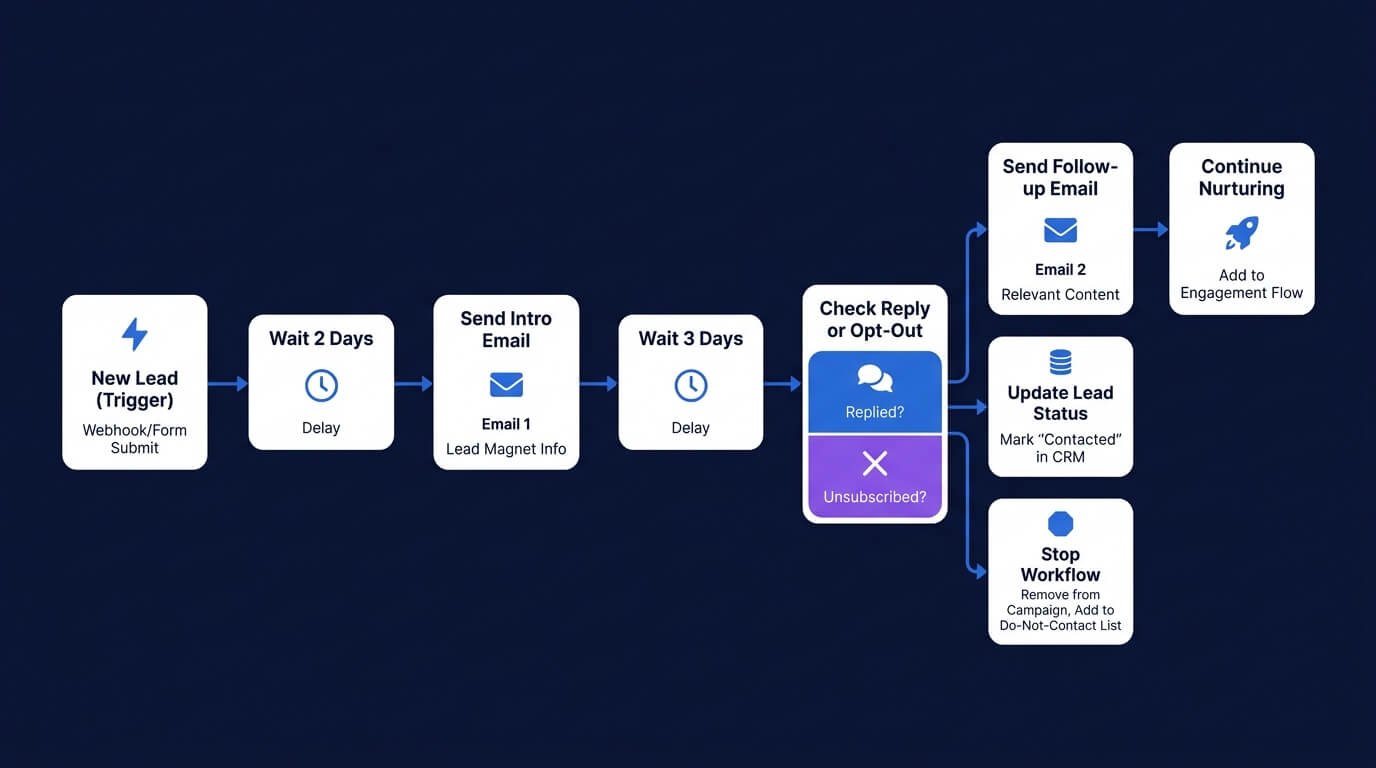
Eligible warm lead → Check follow-up status → Wait → Check eligibility again → Send helpful email → Record activity → Schedule the next step or stop
The second eligibility check is particularly important. A prospect might reply, book a meeting, or opt out while the workflow is waiting. The automation should check the latest available status before sending another message.
Example Nurturing Schedule
The following schedule is an illustrative starting point, not a universally optimal cadence.
| Timing | Email purpose | Example content |
| Day 0 | Helpful introduction | A resource related to the prospect’s stated interest |
| Day 3 | Address a common concern | A short explanation or practical checklist |
| Day 7 | Offer additional value | A relevant guide or implementation example |
| Day 14 | Close the loop | A polite message asking whether further information would be useful |
Adjust the schedule to your sales cycle, previous interactions, and the expectations the prospect established. A high-consideration service may require a different cadence from a low-cost product.
Avoid sending every email simply because a date has arrived. The lead’s current status and communication preferences should determine whether the next step is appropriate.
Tools and Requirements
Before building the workflow, prepare the following:
| Tool | Purpose |
| n8n | Coordinates the nurturing process |
| Google Sheets | Stores lead status and follow-up dates |
| Gmail | Sends follow-up messages |
| Schedule Trigger | Starts periodic checks for due follow-ups |
| Wait node | Pauses an individual execution between stages |
| IF node | Checks eligibility and determines whether to continue |
This implementation uses Google Sheets as a lightweight tracker. If your business already has a CRM, you can adapt the same logic to read and update records there instead.
You’ll need authorized Google Sheets and Gmail credentials in n8n. No AI model or paid AI API is required for the basic version. If your team already uses a CRM, follow our guide on automating CRM updates with n8n to keep customer records synchronized with your automation workflows.
Step 1: Create a Lead Nurturing Tracker
Start by creating a Google Sheet named Lead Nurturing Tracker.
Add the following columns:
| Column | Example value | Purpose |
| Lead ID | L-1001 | Identifies the record |
| First Name | Alex | Personalizes messages |
| alex@example.com | Recipient address | |
| Interest | CRM automation | Provides relevant context |
| Status | Nurturing | Indicates current eligibility |
| Consent Status | Opted In | Records permission or applicable contact basis |
| Next Follow-Up | 2026-11-02 | Determines when a message is due |
| Sequence Stage | 1 | Tracks progress |
| Last Contacted | 2026-10-30 | Records the last send date |
| Reply Status | No Reply | Tracks known responses |
| Unsubscribe | No | Prevents further marketing emails |
| Last Error | Blank | Helps diagnose failures |
The dates above are examples. Use a consistent date format and define which timezone controls scheduling.
Define Your Eligibility Rules
Before connecting any sending nodes, establish the conditions for a lead to receive another email.
A lead should be eligible only when:
- The record has a valid recipient address.
- The lead is in the appropriate nurturing status.
- The next follow-up date is due.
- The lead has not replied or converted.
- The lead has not opted out.
- The business has an appropriate legal basis to send the communication.
These checks should be based on current data, not only on the status recorded when the sequence originally started.
Step 2: Create the n8n Workflow
Open n8n and create a workflow named Warm Lead Nurturing. For the initial implementation, use this structure:
Schedule Trigger → Google Sheets: Read Due Leads → Filter Eligible Records → Process Each Lead → Prepare Email → Gmail: Send → Update Tracker
The processing branch should include a second eligibility check immediately before sending if records can change while the workflow is running. Configure the Schedule Trigger to run once per day at a suitable local business hour. A daily check is generally sufficient for a simple nurturing sequence that doesn’t require immediate responses.
Use the Google Sheets node to retrieve the relevant records. Filter for leads whose next follow-up date is today or earlier and whose status permits another message. For a small tracker, this approach is straightforward. For a larger database, use more selective queries or a CRM with appropriate filtering to avoid processing every record on every run.
If you’re new to building automations, start with our step-by-step n8n workflow automation tutorial for a broader introduction to workflow design.
Step 3: Filter Leads That Are Due
Use an IF node or equivalent filtering logic to separate eligible leads from records that must be skipped.
The positive branch should contain only records that meet all your eligibility rules.
For example:
- Status equals Nurturing.
- Next Follow-Up is less than or equal to the current date.
- Reply Status is not Replied.
- Unsubscribe is not Yes.
- Consent Status meets your communication policy.
- The sequence has not reached its final stage.
Make sure date comparisons account for the chosen timezone and consistent date formats. A simple string comparison can produce incorrect results when dates use inconsistent formats.
If a lead is no longer eligible, do not send the message. Update the record or leave it for a separate review process according to your operating rules.
Step 4: Prepare a Relevant Follow-Up Email
Use an Edit Fields node to prepare the subject and body before passing them to Gmail.
For a service-based business, the first nurturing email might look like this:
Subject: A practical resource for your CRM automation plans
Hi Alex,
I wanted to share a practical resource related to your interest in CRM automation.
It explains a few ways businesses can reduce repetitive updates and keep customer records more consistent.
You can review it here: [Insert relevant resource link]
If you’re still exploring your options, I hope you find it useful. If your priorities have changed, there’s no need to respond.
Best,
[Your Name]
Personalize messages using information the prospect actually provided. Avoid pretending that you’ve reviewed their company, activity, or needs if you haven’t.
For subsequent messages, change the purpose rather than merely changing the subject line. One email might answer a common question, while another might provide a relevant example or invite the prospect to request more information.
Important: Keep marketing emails compliant with the applicable rules for consent, identification, and unsubscribe handling. Don’t treat a publicly available email address as automatic permission to send a marketing sequence.
Step 5: Add the Gmail Send Node
Connect a Gmail node to the eligible branch. Configure the recipient using the email address from the current lead record. Map the prepared subject and message body into the corresponding Gmail fields.
Before enabling automatic sending:
- Confirm that the Gmail credential has the required permissions.
- Send a test message to an address you control.
- Check the subject, personalization, formatting, and links.
- Confirm that the message is sent only for eligible records.
- Verify that an unsuccessful send does not advance the lead to the next stage.
For an initial deployment, consider preparing messages as drafts for human review. Once the workflow has been tested, you can enable automatic sending if it fits your business’s communication policy.
If you’re using Gmail in this workflow, Google’s Gmail API documentation for sending email explains how messages can be sent programmatically.
Step 6: Update the Tracker After Sending
After Gmail reports a successful send, update the corresponding Google Sheets record.
For example, after the first follow-up, the workflow might:
- Set Sequence Stage to 2.
- Set Last Contacted to the actual send date.
- Set Next Follow-Up to the next planned date.
- Keep Status as Nurturing.
To monitor lead activity beyond individual follow-up records, explore our lead tracking dashboard for n8n. However, after the final planned message, change the status to something like Completed instead of scheduling another email.
Only advance the sequence after a successful send. If Gmail returns an error, preserve the current stage and record the failure for investigation or retry.
Prevent Duplicate Emails
Duplicate sending can occur if a workflow runs twice, an execution is retried, or the same record is processed concurrently.
A practical safeguard is to create a unique send identifier for each lead and sequence stage, such as L-1001-stage-2. Record successful sends in a separate activity log and check that identifier before sending again.
For workflows that may process the same lead concurrently, use a data store or database with appropriate uniqueness or locking controls. A basic Google Sheets check alone may not prevent every race condition.
Step 7: Stop the Sequence When a Lead Replies
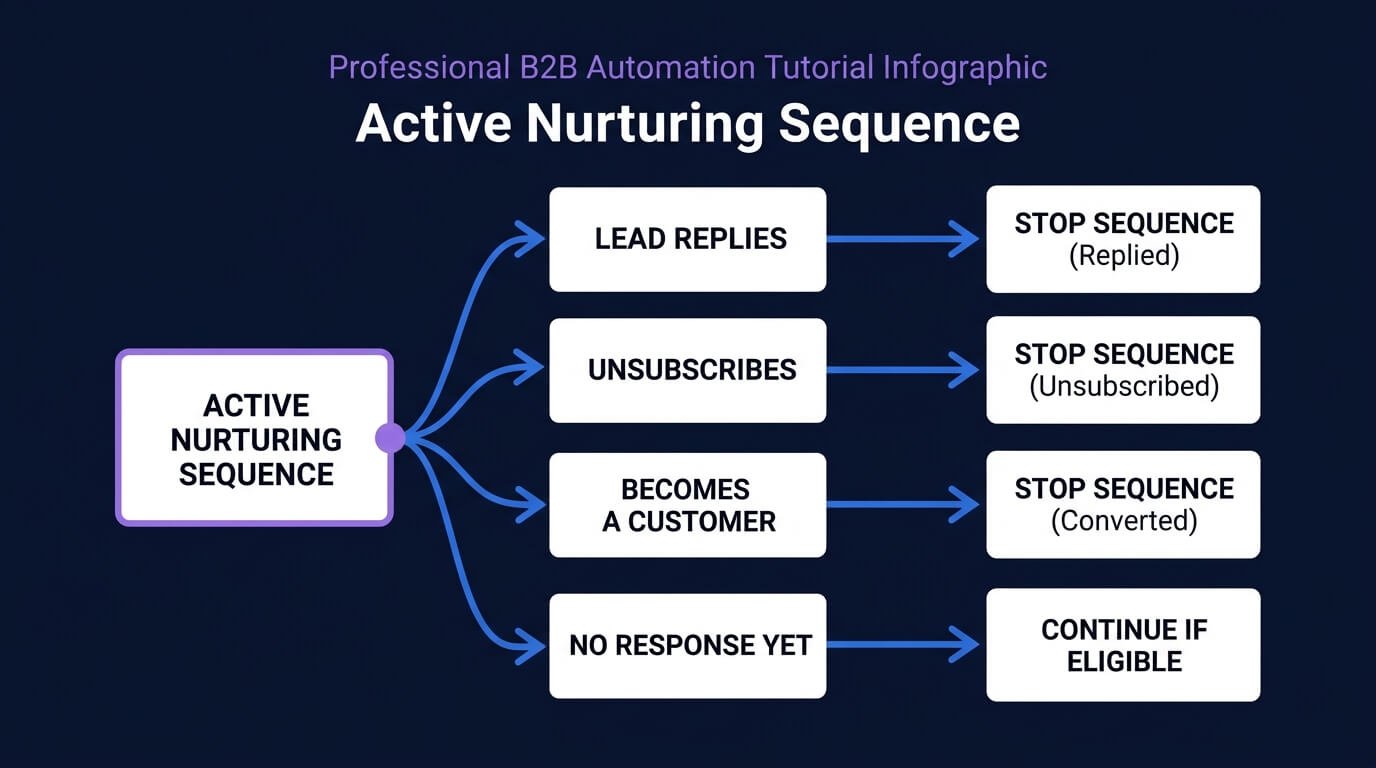
A nurturing sequence should not continue blindly after the prospect responds.
There are several ways to implement reply handling:
- Manual status update: A team member changes Reply Status to Replied after reviewing the inbox.
- Email-triggered workflow: A separate workflow detects incoming messages, identifies the relevant lead, and updates the tracker.
- CRM event: An existing CRM process updates the lead’s communication status when a reply or conversion is recorded.
For the simplest implementation, begin with manual status updates and verify that the scheduled workflow checks the latest status before every send.
For more advanced automation, use a separate Gmail-triggered workflow to detect replies and match them to the correct lead. Matching should account for email addresses, conversation threads, and forwarded messages where relevant. Test this carefully before relying on it to suppress messages automatically.
Also, stop the sequence when a prospect unsubscribes, books a meeting, becomes a customer, or otherwise meets your defined exit conditions.Once a prospect is ready to move forward, a sales pipeline tracker for small businesses can help organize opportunities and track their progress.
For a more advanced email-handling setup, explore our n8n email processing and reply automation tutorial, which covers related ways to automate incoming email workflows.
Step 8: Handle Errors and Monitor Execution
Automation is only useful when failures are visible and recoverable.
Review the n8n Executions view during testing and monitor for issues such as:
- Expired or revoked Google credentials.
- Missing or malformed email addresses.
- Incorrect date parsing.
- Gmail sending errors or rate limits.
- Google Sheets updates failing after an email is sent.
- Records being processed more than once.
Configure error handling so failures are logged and important problems trigger an internal notification. Avoid repeatedly retrying a send without checking whether the original message was already delivered.
If Gmail sends the email successfully but the subsequent spreadsheet update fails, the next execution must not assume that the email was never sent. This is one reason the send log and duplicate-prevention checks are important.
Step 9: Test the Workflow Before Activating It
Use test records and an inbox you control. Do not start by sending messages to your entire lead list.
| Test case | Expected result |
| Eligible lead with a due follow-up | One message is sent |
| Follow-up date is in the future | No message is sent |
| Lead has replied | Sequence is stopped |
| Lead has unsubscribed | No marketing email is sent |
| Email address is missing | Record is skipped and flagged |
| Gmail send fails | Stage does not advance |
| Tracker update fails after sending | Failure is logged and duplicate sending is prevented |
| Workflow runs again for the same stage | No duplicate message is sent |
Also test timezone boundaries, multiple leads due on the same day, and records whose status changes while a sequence is waiting.
After the tests pass, activate the workflow and monitor its first production runs. Review the logs and actual messages before increasing the number of records processed.
Best Practices for an Effective Lead Nurturing Workflow
Keep Each Message Useful
A follow-up should offer a relevant resource, answer a likely question, or provide a clear next step. Repeatedly asking whether someone is ready to buy adds little value.
Respect the Prospect’s Timing
A lead who requested information for a future project may need a slower cadence than someone who asked for an immediate consultation. Use the expectations the prospect established to guide timing.
Separate Automation From Relationship Decisions
Automation can schedule messages and enforce rules, but it cannot always understand the context of a prospect’s response. Route unusual replies, objections, complaints, and purchase questions to a person when appropriate.
Track Outcomes Beyond Emails Sent
Monitor delivery failures, replies, opt-outs, meetings booked, and conversions where you can measure them reliably. Email opens can be affected by privacy features and tracking limitations, so don’t treat them as definitive evidence of interest.
After a prospect becomes a customer, check out our guide to building a client onboarding workflow in n8n, which explains how to automate the next stage of the relationship.
For commercial email campaigns, review the FTC’s CAN-SPAM compliance guide to understand requirements such as honoring opt-out requests and identifying commercial messages appropriately.
Protect Lead Information
Limit access to the tracker and credentials, collect only necessary data, and establish a retention policy. Use appropriate credential management and secure any externally accessible webhook or integration. Don’t place passwords, API keys, or sensitive customer information in workflow logs unnecessarily.
Common Problems and How to Fix Them
The workflow isn’t finding due leads.
Check the date format, timezone, status conditions, and the exact column names returned by Google Sheets.
Emails are being sent more than once.
Check whether the scheduler overlaps with a previous execution, whether records are being processed concurrently, and whether a unique send log is checked before sending.
The workflow keeps emailing people who have replied.
Confirm that reply detection updates the same lead record and that the eligibility check happens immediately before the send step.
The email sends but the tracker doesn’t update.
Inspect the Google Sheets node’s output and credentials. Add recovery logic that checks the send log before retrying the message.
The sequence sends messages at the wrong time.
Standardize date handling and configure the schedule using the intended business timezone. Test around midnight and daylight-saving transitions where applicable.
Frequently Asked Questions
Can I build an n8n lead nurturing workflow without AI?
Yes. The basic workflow uses scheduled triggers, conditional logic, Google Sheets, and Gmail. AI is optional and isn’t required to schedule or send predefined messages.
Do I need a CRM?
No. Google Sheets can work for a small, low-volume implementation. A CRM may be more appropriate when you need shared access, detailed activity histories, stronger record controls, or integration with an existing sales process.
Can the workflow stop automatically when someone replies?
Yes, if you implement reliable reply detection and update the lead’s status before the next send. For a basic version, a manual status update can serve as the stopping mechanism.
How many follow-up emails should I send?
There is no universally correct number. Start with a short sequence, align it with the prospect’s expectations and buying cycle, and adjust it based on meaningful outcomes and opt-out rates.
Can I use the same workflow for every lead?
You can reuse the underlying automation, but message content and timing should reflect the lead’s interests and relationship with your business. Keep eligibility and consent rules consistent while adapting the sequence where appropriate.
Conclusion
An n8n lead nurturing workflow helps businesses maintain consistent, useful communication with warm prospects without manually managing every follow-up. By combining scheduled checks, conditional logic, Gmail, and a reliable activity log, you can build a system that follows a defined cadence while respecting changes in a lead’s status.
Start with a short sequence and a small set of test records. Verify reply handling, duplicate prevention, and error recovery before enabling automatic sending at scale.
If you want to extend the process, connect this workflow to your existing lead qualification and CRM systems. Keep each automation responsible for a clearly defined task so the overall system remains easier to maintain, test, and improve. For more ready-to-use automation ideas, browse our AI workflow templates for business processes.



One Comment