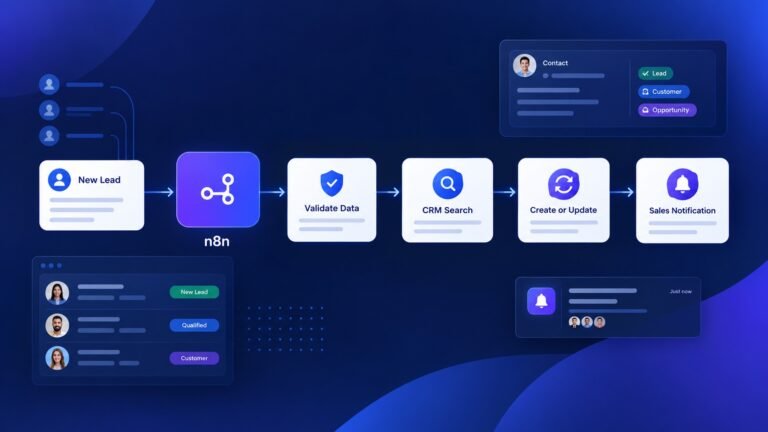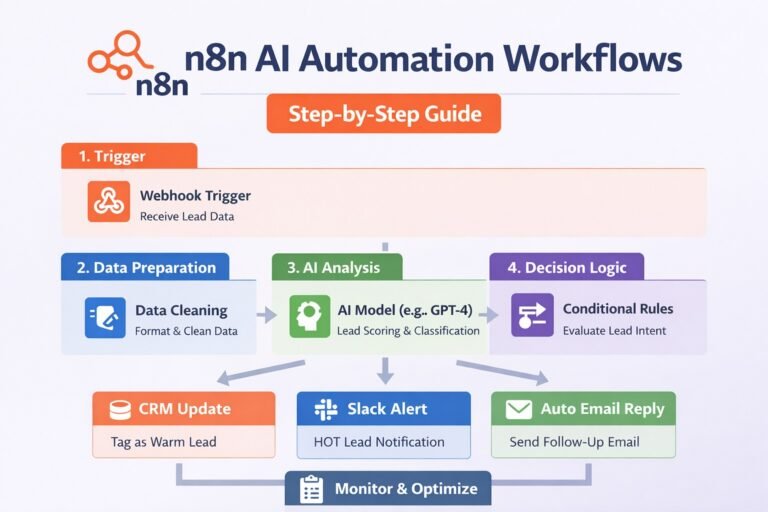
Lead Generation Workflow Templates: 11 Proven Systems to Capture, Qualify & Convert More Leads

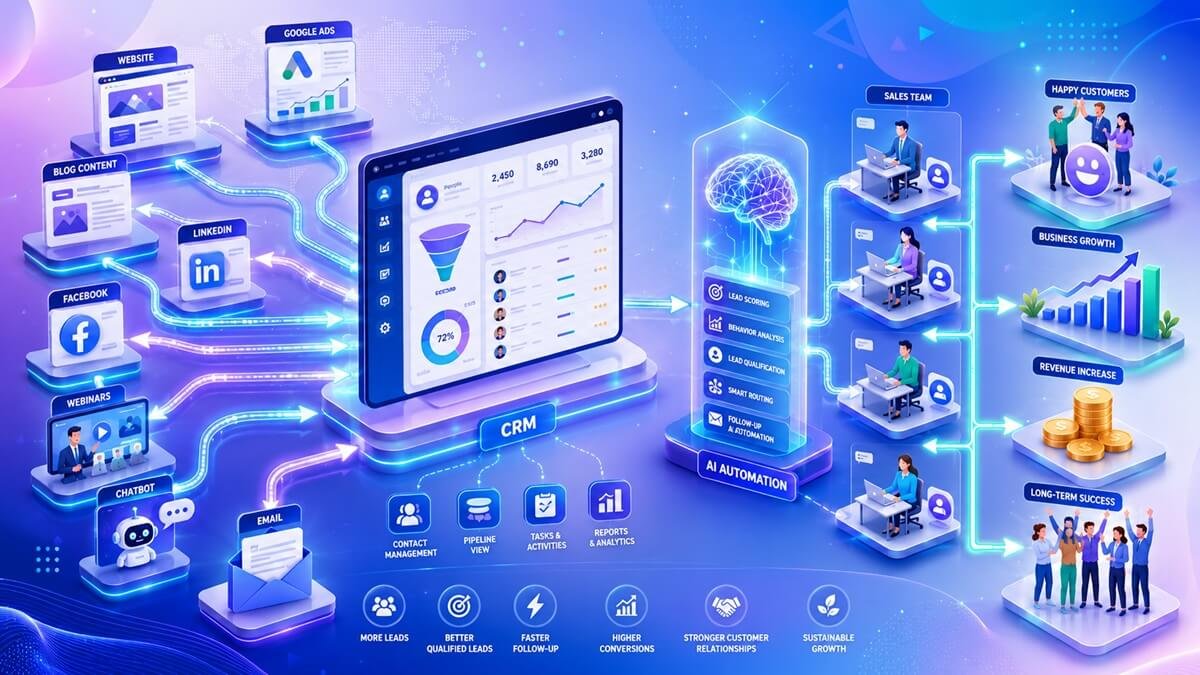
“Build repeatable lead generation systems that turn visitors into qualified opportunities with less manual work and more consistent follow-up.“
Whether you generate leads through SEO, Google Ads, LinkedIn, webinars, referrals, or outbound prospecting, the biggest challenge isn’t attracting interest—it’s managing every lead consistently from the first interaction to the first sales conversation.
This guide walks you through 11 practical lead generation workflow templates used across B2B companies, agencies, consultants, SaaS businesses, and service providers. Instead of focusing on one platform or CRM, the workflows are designed around proven sales and marketing processes that can be adapted to the tools your team already uses.
For every workflow, you’ll learn:
- A visual overview of how the process works.
- The business goals the workflow supports.
- Step-by-step implementation guidance.
- Opportunities to automate repetitive tasks.
- Common mistakes that reduce conversions.
- Key metrics to measure success.
- Practical recommendations to improve performance over time.
After reading this guide, you’ll have a clear framework for building a scalable lead generation system instead of relying on disconnected marketing activities.
Why Trust This Guide?
Lead generation isn’t about collecting as many contacts as possible—it’s about creating a repeatable system that identifies qualified prospects, responds promptly, and moves opportunities through your sales pipeline efficiently.
The workflows in this guide are based on widely accepted sales operations and marketing automation practices used across modern B2B organizations. Rather than promoting a single CRM or automation platform, the focus is on the underlying processes that remain effective regardless of the software you choose.
Every business has different sales cycles, budgets, and customer journeys. A local service company handling a handful of inquiries each week won’t need the same workflow as a SaaS company processing hundreds of trial sign-ups each day. That’s why each template is designed to be adaptable. You can start with a simple process and add automation, lead scoring, or AI-powered tools as your business grows.
Throughout this guide, you’ll also find recommendations for improving workflow efficiency, reducing manual tasks, and measuring results. These are designed as practical starting points that you can refine using your own performance data and customer feedback.
Who This Guide Is For
These workflow templates are useful for:
- B2B SaaS companies
- Marketing and automation agencies
- Consultants and professional service providers
- Local service businesses
- Sales development teams
- Marketing operations teams
- Revenue operations (RevOps) professionals
- Small businesses building their first sales process
- Organizations looking to automate lead management
“If your goal is to generate more qualified leads while improving follow-up consistency, these templates can help you create a process that’s easier to manage and scale.“
What Is a Lead Generation Workflow?
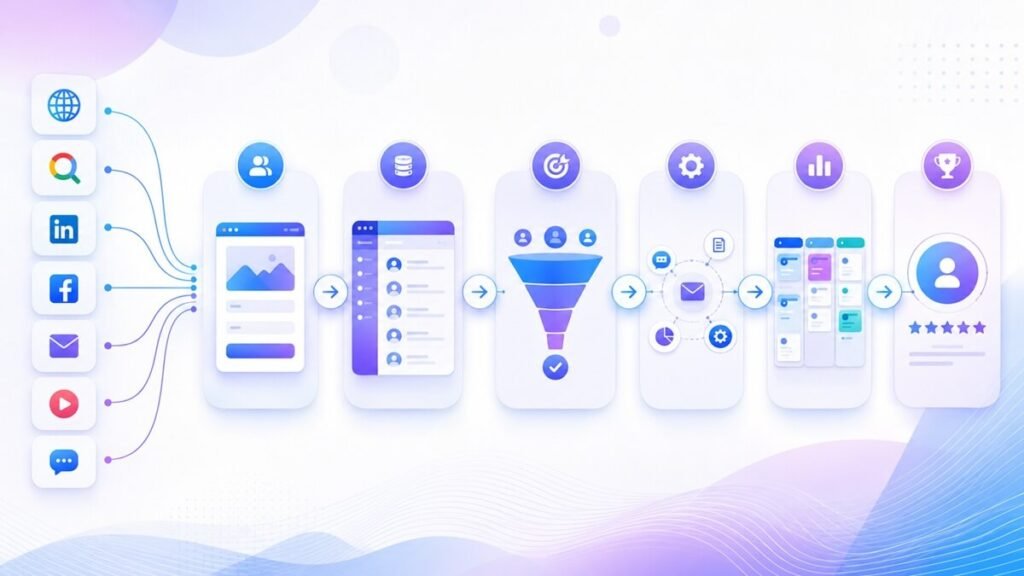
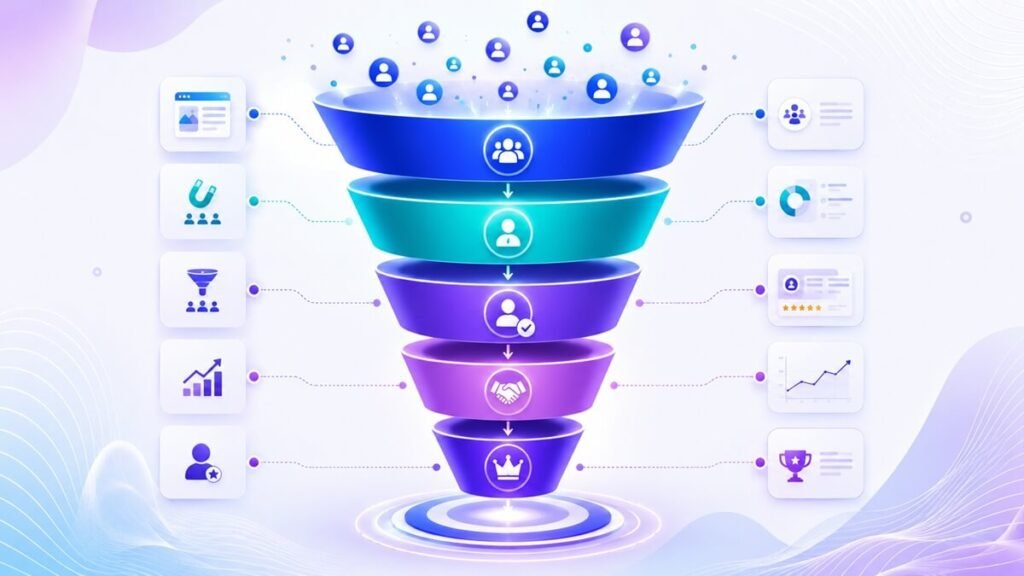
A lead generation workflow is a documented sequence of actions that moves a prospect from their first interaction with your business to becoming a qualified sales opportunity. Instead of relying on manual tasks or individual team members to remember every follow-up, workflows define what should happen automatically and what requires human involvement.
A general workflow includes stages such as:
Lead Source
↓
Lead Capture
↓
CRM
↓
Qualification
↓
Lead Scoring
↓
Sales Assignment
↓
Follow-up
↓
Meeting
↓
Opportunity
Each stage has a specific purpose. For example, once a visitor submits a contact form, the workflow might automatically create a CRM record, notify the appropriate salesperson, send a confirmation email, and schedule follow-up reminders. If the lead meets your qualification criteria, the opportunity can then move into your active sales pipeline.
Without a documented workflow, businesses often experience delayed responses, inconsistent communication, duplicate records, and missed opportunities.
Why Every Business Needs Documented Lead Generation Workflows
Many organizations invest heavily in attracting visitors but overlook what happens after someone expresses interest. Imagine two businesses receiving the same number of monthly leads.
Business A
- Contact forms are emailed to a shared inbox.
- Sales representatives manually assign leads.
- Follow-up depends on individual availability.
- CRM updates happen inconsistently.
- Marketing has limited visibility into outcomes.
Business B
- Every inquiry enters a CRM automatically.
- Leads are assigned based on territory or expertise.
- Prospects receive an immediate confirmation email.
- Follow-up reminders are created automatically.
- Marketing and sales teams track progress through a shared dashboard.
Although both companies generate the same number of inquiries, Business B is far more likely to respond quickly, reduce administrative work, and provide a better experience for potential customers. The difference isn’t more traffic—it’s a better process.
The Building Blocks of Every Lead Generation Workflow
Although each workflow in this guide serves a different purpose, most successful systems include the following components.
| Workflow Stage | Purpose |
| Lead Source | Where prospects discover your business, such as search engines, social media, referrals, or advertising. |
| Lead Capture | Collect contact information through forms, chatbots, phone calls, or landing pages. |
| CRM Integration | Store lead information in a central system accessible to sales and marketing teams. |
| Lead Enrichment | Add additional information such as company size, industry, or location when available. |
| Qualification | Determine whether the lead matches your ideal customer profile. |
| Lead Scoring | Prioritize opportunities based on fit, behavior, or engagement. |
| Sales Assignment | Route qualified leads to the appropriate salesperson or team. |
| Follow-up Automation | Send emails, reminders, or notifications to maintain communication. |
| Performance Tracking | Measure conversion rates, response times, and pipeline performance. |
Not every workflow requires every stage. Smaller businesses can begin with only lead capture, CRM integration, and follow-up before adding more advanced capabilities.
Before You Choose a Workflow
Choosing the right workflow depends on how your business generates leads and how customers make buying decisions. Ask yourself these questions:
- Where do most of our leads come from today?
- Which lead source produces the highest-quality opportunities?
- How quickly does our team respond to new inquiries?
- Do we already use a CRM?
- Which tasks consume the most manual effort?
- Where do prospects typically stop moving through our sales process?
Your answers will help you identify which workflow to implement first.
For example:
- If your website generates regular inquiries, start with a Website Contact Form Workflow.
- If SEO is your primary acquisition channel, implement a Content Marketing Workflow.
- If your sales team relies on outbound prospecting, build a Cold Email Workflow.
- If referrals generate your best customers, create a structured Referral Workflow.
- If your business already has strong lead volume but inconsistent follow-up, prioritize Lead Qualification and CRM Automation workflows.
You don’t need to implement every workflow at once. Start with the area that has the greatest impact on your current sales process, measure the results, and expand your automation over time.
How to Get the Most Value from This Guide
You don’t need to copy every workflow exactly as it’s presented.
Instead:
- Identify your primary lead source.
- Select the matching workflow template.
- Adapt it to your existing tools and sales process.
- Automate repetitive tasks where it makes sense.
- Measure performance using clear metrics.
- Review the workflow regularly and improve it based on real-world results.
Treat these templates as building blocks rather than fixed rules. Every business is different, and the most effective workflow is the one that fits your customers, your team, and your goals.
Workflow Template #1: Website Contact Form Workflow
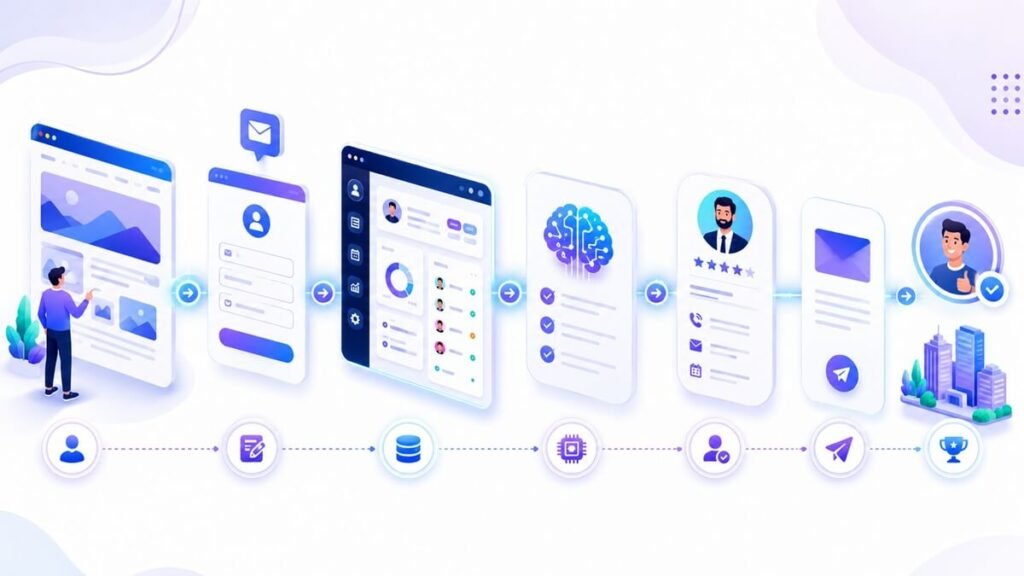
Turn website inquiries into qualified sales conversations with a fast, consistent follow-up process.
- Best For: Service businesses, agencies, SaaS companies, consultants, legal firms, healthcare providers, and other organizations that generate leads through their websites.
- Primary Goal: Capture every legitimate inquiry, route it to the right person, and begin meaningful conversations before prospects lose interest.
Why This Workflow Is Different
Every website visitor who completes a contact form has already taken several buying steps. They’ve found your business, explored your services, and decided you’re worth contacting.
The biggest risk isn’t generating more inquiries—it’s failing to respond quickly and consistently. An effective contact form workflow removes delays between submission and first response and gives every prospect a professional experience to ensure your sales team never loses track of qualified opportunities.
Workflow Overview
Website Visitor
        ↓
Contact Form Submission
        ↓
Validation & Spam Screening
        ↓
CRM Record Creation
        ↓
Lead Routing
        ↓
Confirmation Email
        ↓
Sales Review
        ↓
Discovery Call
        ↓
Qualified Opportunity
This process focuses on speed, organization, and ownership, not long-term lead nurturing.
Step 1: Design a Low-Friction Contact Form
A contact form should start a conversation—not conduct an interview. Collect only the information your team genuinely needs to respond professionally. Recommended fields include:
- Full name
- Business email
- Company name
- Phone number (optional)
- Service of interest
- Brief project description
If visitors must complete ten or more fields before they can contact you, many simply won’t. Reserve detailed discovery questions such as budget, implementation timeline, or company size for your first conversation instead of the initial form.
Step 2: Protect Data Quality Before It Reaches Your CRM
Not every submission deserves to become a sales opportunity. Before creating a CRM record, verify that each submission is legitimate by checking:
- Required fields
- Email formatting
- Spam protection
- Duplicate submissions
- Suspicious or incomplete entries
Cleaning submissions before they enter your CRM keeps your pipeline accurate and saves your sales team valuable time.
Step 3: Route Every Inquiry Automatically
One of the most common reasons businesses lose leads is uncertainty about ownership. Every qualified inquiry should immediately reach the person best equipped to continue the conversation. Assignment rules might include:
| Assignment Rule | Example |
|---|---|
| Geographic region | North America → Regional Sales Manager |
| Product interest | Enterprise Services → Enterprise Team |
| Industry | Healthcare → Healthcare Specialist |
| Existing customer | Assigned Account Manager |
| Team workload | Next available representative |
Clear routing removes bottlenecks and prevents inquiries from sitting unattended in shared inboxes.
Step 4: Deliver an Immediate Confirmation
Your first email should reassure prospects that their inquiry has been received—not simply acknowledge it. An effective confirmation message should:
- Thank them for contacting your business.
- Confirm their request was received successfully.
- Explain when they should expect a response.
- Introduce the next step in the process.
- Include contact details for urgent questions.
Setting expectations early improves trust before a salesperson even joins the conversation.
Step 5: Prepare Before Making Contact
A discovery call should begin with understanding—not basic fact gathering. Before reaching out, review:
- Submitted project details
- Previous website activity (if available)
- Downloaded resources
- Marketing campaign source
- Existing CRM history
Prepared conversations feel more consultative and reduce repetitive questions that prospects have already answered.
Practical Example
A visitor downloads your pricing guide, explores your service pages, and submits a request for a consultation. Within seconds:
- The form passes spam validation.
- A CRM record is created automatically.
- The inquiry is assigned to the correct sales representative.
- A confirmation email is sent.
- The sales representative receives an instant notification with the prospect’s submitted information.
Because the representative already understands the prospect’s interests, the first conversation focuses on solving business problems rather than collecting basic information.
Recommended Automation Stack
Although every business uses different software, most modern workflows include tools for:
| Function | Purpose |
|---|---|
| Website Form | Capture inquiries |
| CRM | Store and manage leads |
| Workflow Automation | Route contacts and notifications |
| Calendar Scheduling | Book discovery calls |
| Email Platform | Send confirmation messages |
Choose tools that integrate reliably rather than assembling the largest possible technology stack.
Performance Metrics That Actually Matter
Instead of measuring only the number of inquiries, monitor how efficiently they move toward a sales conversation.
| KPI | Why It Matters |
|---|---|
| Contact Form Conversion Rate | Indicates how effectively visitors become leads. |
| First Response Time | Measures how quickly your team engages new inquiries. |
| Discovery Call Booking Rate | Shows how many leads advance to a conversation. |
| Qualified Lead Rate | Evaluates inquiry quality rather than volume. |
| Opportunity Creation Rate | Measures how many inquiries become genuine sales opportunities. |
These metrics reveal where prospects drop out of the process and help prioritize workflow improvements.
Quick Optimization Checklist
Before launching your workflow, confirm that:
✅ Contact form works on desktop and mobile.
✅ Spam protection is enabled.
✅ CRM records are created automatically.
✅ Lead routing rules are documented.
✅ Confirmation emails are active.
✅ Sales notifications are functioning.
✅ Discovery calls can be scheduled without manual coordination.
✅ Conversion tracking is enabled.
Practical Insight
A common mistake is trying to collect every possible detail in the first interaction. In practice, shorter forms often generate more qualified inquiries because they reduce friction for genuine prospects. Use your website to start conversations quickly, then gather deeper qualification information during the discovery process.
Workflow Template #2: Content Marketing Lead Generation Workflow
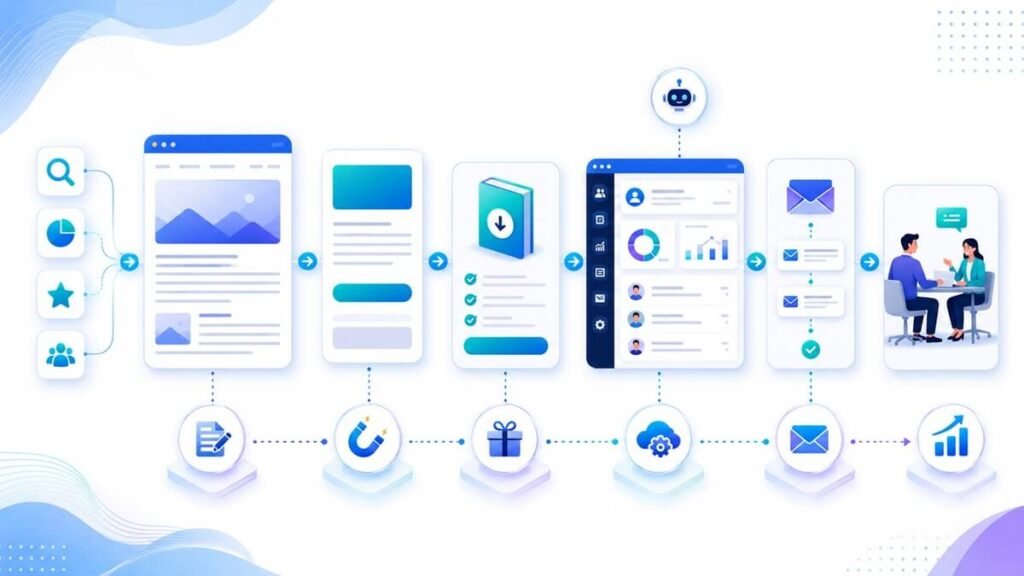
Content marketing workflow showing how educational content attracts qualified visitors, builds trust, and converts readers into marketing-qualified leads through valuable resources and strategic nurturing.
- Best for: SaaS companies, agencies, consultants, software businesses, professional service firms, and brands investing in long-term SEO.
- Primary Goal: Transform organic search traffic into a predictable source of qualified leads by guiding readers through a value-driven content journey.
Why Content Converts
Unlike paid advertising or cold outreach, content marketing reaches people who are already looking for answers. They aren’t being interrupted by an advertisement—they’re actively searching for solutions to a problem.
Every blog article, guide, comparison, or tutorial represents an opportunity to demonstrate expertise before asking for anything in return. When visitors consistently find accurate, practical information on your website, trust develops naturally, making future conversions much easier.
The objective isn’t simply to increase website traffic. It’s to attract the right audience, answer their questions better than competitors, and encourage them to continue learning through additional resources. Successful content marketing turns search intent into business opportunities by creating value first and promoting services second.
Content Journey
Google Search
        ↓
Educational Article
        ↓
Helpful Content
        ↓
Relevant Call to Action
        ↓
Lead Magnet
        ↓
Landing Page
        ↓
Email Subscription
        ↓
Educational Email Journey
        ↓
Marketing Qualified Lead
Every stage naturally builds on the previous one. Readers never feel pressured because each step offers additional value instead of demanding an immediate buying decision.
Step 1: Target High-Intent Search Topics
Great content begins long before writing. Start by identifying questions potential customers ask before purchasing a solution. Focus on topics that demonstrate clear commercial relevance while still providing educational value. High-performing content ideas include:
- Buying guides
- Product comparisons
- Implementation tutorials
- Industry best practices
- Common mistakes
- Step-by-step walkthroughs
- Frequently asked questions
Instead of chasing broad keywords with massive search volume, prioritize topics closely connected to your services. For example, if your company provides CRM implementation services, articles about CRM migration planning, workflow automation, sales pipeline optimization, and CRM software comparisons will attract visitors who are much more likely to become future customers.
Step 2: Create Content Worth Saving
Search engines reward helpful content, but readers share and bookmark content that solves real problems. Each article should provide enough practical information that visitors can immediately apply what they’ve learned. Strong educational content often includes:
- Original insights based on experience
- Practical implementation advice
- Visual workflow diagrams
- Comparison tables
- Checklists
- Examples from real business scenarios
- Frequently asked questions
- Actionable next steps
Instead of writing for search engines alone, focus on becoming the most useful resource available for that topic. When readers save your content for future reference, they’re also more likely to remember your brand when they’re ready to make a purchasing decision.
Step 3: Match Every CTA With Search Intent
A common mistake in content marketing is using the same call to action across every article. Readers are much more likely to convert when the next offer naturally extends what they’ve just learned. For example:
| Article Topic | Recommended Next Step |
|---|---|
| CRM Implementation Guide | CRM Implementation Checklist |
| AI Workflow Automation | AI Workflow Templates |
| Revenue Operations | Revenue Planning Workbook |
| Lead Generation | Lead Generation Workflow Templates |
| Voice Search SEO | SEO Optimization Checklist |
Every call to action should answer the question:
“What would help this reader immediately after finishing this article?”
When the offer feels like a logical continuation instead of a sales pitch, conversion rates generally improve.
Step 4: Build a Landing Page With One Clear Goal
Once readers click your call to action, remove unnecessary distractions and keep their attention focused on a single outcome. An effective landing page should clearly explain:
- What visitors will receive
- Why the resource is valuable
- Who it is designed for
- How it helps solve a specific problem
- What information is required to access it
Keep lead capture forms simple. For most businesses, requesting a name, business email, and company name is sufficient for the first interaction. Long forms asking for budgets, employee counts, phone numbers, and implementation timelines often reduce conversions unless the offer provides exceptional value.
Most importantly, ensure that the messaging on the landing page matches the promise made in the article. Visitors should immediately recognize they’re in the right place and understand exactly what they’ll gain by completing the form.
Step 5: Deliver Your Lead Magnet Immediately
The moment a visitor submits your form, fulfill your promise without delay. Immediate delivery reinforces trust and confirms that your business is organized and reliable.
Whether you’re offering:
- Workflow templates
- Implementation checklists
- Industry reports
- Whitepapers
- Calculators
- Case studies
- Buying guides
Make the resource accessible instantly through a thank-you page, email, or both. Your delivery email should remain simple and helpful. Include:
- A thank-you message.
- A direct download link.
- Brief instructions on how to use the resource.
- Links to related educational content.
- Contact information for additional questions.
Avoid turning the first email into a sales pitch. The objective is to strengthen credibility while encouraging readers to continue learning.
Step 6: Build an Educational Email Journey
Downloading a resource usually means a visitor is interested—not necessarily ready to buy. Instead of sending repeated promotional emails, continue providing practical information that helps readers solve their challenges. A simple nurture sequence could include:
| Purpose | |
|---|---|
| Email 1 | Deliver the promised resource and explain what to expect next. |
| Email 2 | Address a common challenge related to the topic. |
| Email 3 | Share a real-world example or customer success story. |
| Email 4 | Introduce another helpful guide, template, or checklist. |
| Email 5 | Invite readers to schedule a consultation, demo, or strategy call. |
Each email should answer a question or solve a problem independently. When subscribers consistently receive useful information, trust grows naturally and sales conversations become much easier.
Step 7: Recognize Buying Intent
Not every subscriber follows the same journey. Some readers consume educational content for weeks before making a decision, while others may be ready after downloading a single resource. Rather than treating every lead equally, monitor behaviors that indicate increasing interest.
Examples include:
- Downloading multiple resources.
- Returning to your website frequently.
- Visiting service or pricing pages.
- Registering for webinars.
- Watching product demonstrations.
- Replying to educational emails.
- Spending more time on high-intent pages.
These actions often indicate that a visitor is moving from research toward evaluation, making them stronger candidates for a sales conversation.
Lead Magnet Strategy
The quality of your lead magnet directly influences the quality of your leads. Instead of creating generic PDFs, develop resources that solve a specific problem and naturally complement your services.
Examples include:
| Content Topic | Recommended Lead Magnet |
|---|---|
| AI Workflow Automation | AI Workflow Template Pack |
| CRM Implementation | CRM Implementation Checklist |
| Lead Generation | Lead Generation Playbook |
| Revenue Operations | Revenue Operations Assessment |
| SEO Strategy | SEO Content Audit Template |
| Marketing Automation | Automation Planning Workbook |
Every lead magnet should provide practical value while positioning your business as a trusted source of expertise.
Email Nurture Framework
Effective email nurturing is about educating, not overwhelming. A balanced nurture sequence typically follows this progression:
Educate
Help subscribers better understand their challenges and available solutions.
↓
Build Trust
Share implementation advice, practical examples, and useful resources.
↓
Demonstrate Expertise
Introduce case studies, success stories, or industry insights that reinforce credibility.
↓
Invite Engagement
Offer opportunities to schedule consultations, attend webinars, or explore your services when subscribers are ready.
This gradual progression keeps communication relevant while allowing prospects to move forward at their own pace.
Content Audit
Publishing new articles is only one part of a successful content strategy. Existing content often provides the greatest opportunity for improving lead generation. Review your highest-traffic articles regularly using the following framework:
| Review Area | Questions to Ask |
|---|---|
| Search Intent | Does the article fully answer the reader’s question? |
| Content Quality | Is the information accurate, complete, and up to date? |
| Internal Linking | Are readers guided to relevant supporting resources? |
| CTA Relevance | Does the offer naturally match the article topic? |
| User Experience | Is the content easy to scan with headings, tables, and visuals? |
| Freshness | Have outdated examples, statistics, or screenshots been updated? |
Improving proven content often delivers faster results than publishing new articles from scratch.
ROI Metrics
Traffic alone doesn’t measure the success of content marketing. Instead, evaluate how effectively your content contributes to business growth.
| KPI | Why It Matters |
|---|---|
| Organic Traffic | Measures search visibility and audience growth. |
| CTA Click Rate | Indicates whether readers continue their journey. |
| Landing Page Conversion Rate | Measures how effectively visitors become subscribers. |
| Lead Magnet Download Rate | Evaluates the relevance of your offer. |
| Marketing Qualified Leads (MQLs) | Measures lead quality generated by content. |
| Sales Qualified Leads (SQLs) | Indicates how many leads are ready for sales conversations. |
| Revenue Attribution | Connects content performance directly to business outcomes. |
A single article generating consistent qualified leads and revenue is often more valuable than dozens of articles producing only page views.
SEO Insight
Content marketing succeeds when every article serves a clear purpose within your overall customer journey. Instead of treating blog posts as isolated pieces of content, connect them through relevant internal links, complementary resources, and logical next steps that continue educating readers.
As your content library grows, regularly update your highest-performing articles with new insights, examples, statistics, and supporting resources. The most successful content strategies don’t simply attract visitors—they guide the right audience from their first Google search to an informed purchasing decision while building trust at every stage of the journey.
Workflow Template #3: Lead Magnet Workflow
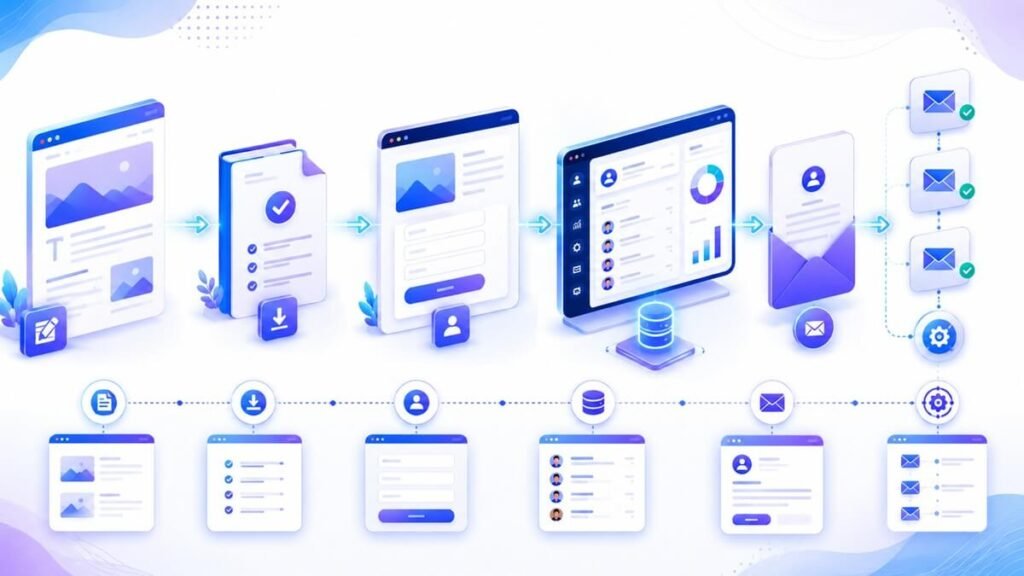
Lead magnet workflow showing how valuable downloadable resources convert anonymous website visitors into engaged subscribers and future customers.
- Best for: B2B companies, SaaS businesses, agencies, consultants, coaches, technology companies, and organizations using educational content to generate qualified leads.
- Primary Goal: Encourage visitors to exchange their contact information for a resource that delivers immediate value while beginning a long-term relationship.
Offer Design Framework
A lead magnet succeeds because it solves one specific problem immediately. Visitors don’t download resources because they’re free. They download them because they believe the resource will save time, simplify a task, or help them make a better decision.
The most effective offers are practical rather than theoretical. Instead of explaining what to do, they help people actually do it. Think of a lead magnet as the first product your audience experiences. If that experience is valuable, trust grows naturally and future offers become much easier to accept.
Step 1: Solve One Specific Problem
Avoid creating broad resources that try to cover everything. Instead, focus on one clearly defined challenge.
Examples include:
- CRM Implementation Checklist
- AI Workflow Planning Template
- SEO Audit Worksheet
- Lead Qualification Scorecard
- Client Onboarding Checklist
- Revenue Planning Workbook
Specific resources generally outperform general ebooks because visitors immediately understand their value.
Step 2: Create Something People Can Use Today
High-converting lead magnets usually save readers time.
Good examples include:
- Ready-to-use templates
- Copy-and-paste frameworks
- Worksheets
- SOPs
- Checklists
- Calculators
- Planning documents
- Swipe files
Ask yourself one question:
Can someone apply this resource within the next hour?
If the answer is yes, it will usually generate more conversions than lengthy educational PDFs.
Step 3: Match the Offer to Visitor Intent
Every lead magnet should extend the topic visitors are already reading.
Examples:
| Visitor Reads | Offer |
|---|---|
| CRM Implementation Guide | CRM Implementation Checklist |
| AI Workflow Article | AI Workflow Templates |
| Revenue Operations Guide | Revenue Planning Workbook |
| Voice Search SEO | SEO Optimization Checklist |
Strong topic alignment increases conversion because readers already recognize the value of continuing.
Step 4: Remove Friction From the Signup Process
Every additional step reduces conversions. Your landing page should focus on one objective:
Download the resource.
Keep forms short. For most businesses, only request:
- Name
- Business email
- Company
Ask for additional information only when it genuinely improves the subscriber experience.
Step 5: Deliver Value Immediately
Once visitors submit the form:
- Display a thank-you page.
- Deliver the download instantly.
- Confirm the email address.
- Recommend one related resource.
- Explain what happens next.
Immediate fulfillment reinforces trust and creates a positive first impression.
Step 6: Continue Helping
Subscribers shouldn’t hear from you only when you’re selling something. Follow the initial download with practical advice that expands on the resource.
Examples include:
- Implementation tips
- Common mistakes
- Best practices
- Industry examples
- Additional templates
Each interaction should make the original resource even more valuable.
Step 7: Watch Engagement Patterns
Not every subscriber follows the same path. Pay attention to behaviors such as:
- Multiple downloads
- Returning visitors
- Webinar registrations
- Service page visits
- Email replies
- Resource sharing
These actions often indicate increasing interest and help prioritize future communication.
Conversion Formula
Successful lead magnets usually follow this progression:
Problem
        ↓
Practical Resource
        ↓
Simple Signup
        ↓
Instant Value
        ↓
Continued Education
        ↓
Growing Trust
        ↓
Qualified Opportunity
Each stage should make the next step feel like a natural continuation rather than a sales funnel.
Landing Page Essentials
Before publishing your lead magnet, confirm that the landing page includes:
| Element | Purpose |
|---|---|
| Clear headline | Explains the value immediately |
| Benefit-focused copy | Shows what readers will achieve |
| Preview image | Builds confidence in the resource |
| Short signup form | Reduces friction |
| Strong CTA | Encourages immediate action |
| Trust indicators | Reinforce credibility |
A focused landing page almost always outperforms one filled with multiple offers and distractions.
Lead Magnet Quality Checklist
Before launching a new resource, ask:
✅ Does it solve one specific problem?
✅ Can readers use it immediately?
✅ Is it directly related to the article?
✅ Is the download easy to access?
✅ Does it save time?
✅ Would someone consider paying for it?
If you answer “no” to several of these questions, improve the resource before promoting it.
Performance Dashboard
Evaluate lead magnets using business-focused metrics rather than download volume alone.
| KPI | Why It Matters |
|---|---|
| Landing Page Conversion Rate | Measures how effectively visitors become subscribers. |
| Download Rate | Indicates perceived value. |
| Email Open Rate | Measures initial engagement. |
| Resource Completion Rate | Shows whether subscribers actually use the resource. |
| Consultation Requests | Measures business impact. |
| Customer Conversion Rate | Connects downloads to revenue. |
Conversion Insight
The highest-converting lead magnets rarely contain the most pages. They solve one problem exceptionally well.
Instead of creating another comprehensive ebook, build resources that help readers complete a task faster, avoid common mistakes, or make a confident decision. When subscribers achieve a quick win using your resource, they’re far more likely to trust your expertise and continue engaging with your business.
You have not enough Humanizer words left. Upgrade your Surfer plan.
Workflow Template #4: Cold Email Outreach Workflow
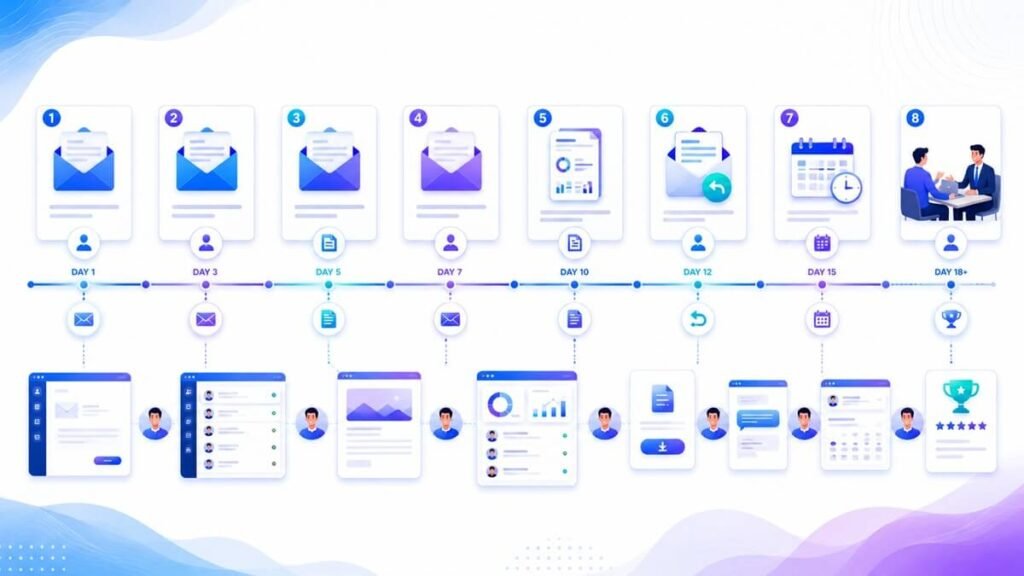
Cold email workflow designed to help businesses start meaningful conversations with qualified prospects through research, personalization, and structured follow-up instead of mass outreach.
- Best for: B2B SaaS companies, agencies, consultants, software providers, IT services, managed service providers (MSPs), and sales teams targeting specific industries.
- Primary Goal: Build a repeatable outbound prospecting system that consistently generates qualified conversations with decision-makers.
Outreach Framework
Cold email works best when it feels like a relevant business conversation—not an unsolicited sales pitch. Instead of sending the same message to hundreds of companies, successful outbound teams begin by identifying organizations that closely match their Ideal Customer Profile (ICP). They research each business, personalize every message, and provide value before requesting a meeting.
The objective isn’t simply to generate replies. It’s to connect with companies facing challenges your business is genuinely qualified to solve. When every stage of the workflow is built around relevance and timing, cold email becomes a predictable lead generation channel that complements your inbound marketing efforts rather than competing with them.
Step 1: Build a Precise Ideal Customer Profile
Successful outreach starts with clarity. Before searching for prospects, define the characteristics of businesses that benefit most from your products or services. Your Ideal Customer Profile should include factors such as:
- Industry
- Company size
- Geographic location
- Business model
- Annual revenue (if relevant)
- Technology stack
- Decision-maker roles
- Operational challenges
- Growth stage
Avoid creating a profile that’s too broad. The more specific your ICP becomes, the easier it is to write relevant outreach that resonates with the recipient.
Step 2: Research Companies Before Building Your List
Don’t build prospect lists based solely on company names. Take time to understand each organization before adding it to your outreach campaign.
Look for information such as:
- Company website
- Products or services
- Target customers
- Recent company news
- New product launches
- Hiring activity
- Technology adoption
- Industry trends
- Expansion into new markets
Research provides valuable context that helps you write emails demonstrating genuine interest instead of generic sales messaging. Even five minutes of research can dramatically improve the quality of your outreach.
Step 3: Verify Contact Data
Poor-quality contact information hurts more than campaign performance—it can damage your sender reputation. Before sending your first email:
- Verify business email addresses.
- Remove duplicate contacts.
- Confirm decision-maker roles.
- Eliminate outdated records.
- Check for invalid or inactive domains.
Maintaining a clean prospect database improves deliverability while helping your team focus on real opportunities rather than inaccurate contact information.
Step 4: Prepare Prospect Profiles
Before writing outreach, organize the information you’ve gathered into concise prospect profiles. Each profile should include:
| Information | Why It Matters |
|---|---|
| Company Name | Identifies the organization. |
| Industry | Helps tailor messaging. |
| Decision Maker | Personalizes communication. |
| Current Challenge | Provides a relevant conversation starter. |
| Recent Business Activity | Demonstrates research. |
| Potential Opportunity | Connects your solution to their needs. |
Having this information readily available allows every email to feel thoughtful and relevant rather than copied from a template.
Step 5: Write Personalized First Emails
The opening email should demonstrate that you’ve done your homework. Avoid lengthy introductions or immediately promoting your services. Instead, focus on the recipient’s business.
A simple structure works well:
- Brief introduction.
- Personalized observation.
- Relevant business challenge.
- Helpful insight.
- Low-pressure question or invitation to continue the conversation.
Keep your message concise.
Decision-makers receive dozens of sales emails every week. A short, relevant message that addresses their business directly is far more likely to earn attention than a long email describing every feature of your product. Remember that the first email is designed to start a conversation, not close a sale.
Step 6: Build a Value-Driven Follow-up Sequence
Most prospects won’t respond to the first email, and that’s completely normal. They may be busy, prioritizing other projects, or simply missed your message. Instead of repeatedly asking whether they saw your previous email, use each follow-up to provide additional value. A strong follow-up sequence should introduce new information every time you reach out.
For example:
- Share an industry insight related to their business.
- Highlight a common operational challenge.
- Provide a practical resource or guide.
- Mention a relevant customer success story.
- Ask a thoughtful question that encourages discussion.
Every email should move the conversation forward rather than repeating your original message. Keep follow-ups professional, respectful, and spaced far enough apart that they don’t feel intrusive.
Step 7: Manage Replies Efficiently
Once prospects begin responding, speed and organization become more important than sending additional outreach. Create a simple process for handling different response types.
| Reply Type | Recommended Action |
|---|---|
| Positive Interest | Schedule a discovery call and pause the outreach sequence. |
| Requests More Information | Provide helpful answers and relevant resources. |
| Not the Right Contact | Ask whether another decision-maker would be more appropriate. |
| Not Interested | Thank them politely and update your records. |
| Future Opportunity | Schedule a reminder to reconnect later. |
Responding consistently creates a better experience while keeping your pipeline organized.
Step 8: Qualify Interested Prospects
A positive reply doesn’t automatically mean a qualified opportunity. Before scheduling meetings, confirm that your solution genuinely fits the prospect’s needs.
Topics worth exploring include:
- Current business challenges
- Existing processes or tools
- Decision-making authority
- Business priorities
- Expected implementation timeline
- Success objectives
Focus on understanding the prospect’s situation rather than trying to force a sale. The best discovery conversations feel collaborative because both sides are evaluating whether there’s a good fit.
Step 9: Transition to Discovery Calls
Once a prospect meets your qualification criteria, move the conversation into a structured discovery call. Preparation makes a significant difference.
Before the meeting, review:
- Previous email conversations.
- Company background.
- Notes collected during research.
- Recent business developments.
- Questions you’d like to explore.
Starting the meeting with context demonstrates professionalism and allows more time to discuss business goals instead of gathering basic information.
Personalization Formula
Effective personalization goes beyond inserting a recipient’s first name. Use publicly available business information to make every message more relevant.
| Personalization Element | Example |
|---|---|
| Company Update | New office location, funding announcement, or product launch |
| Industry Challenge | Regulatory changes or increased competition |
| Recent Achievement | Award, partnership, or business milestone |
| Business Observation | Growth initiative or hiring trend |
| Conversation Starter | Question based on a recent announcement or initiative |
One meaningful observation usually creates more impact than several generic compliments.
Follow-up Timeline
Consistency matters more than frequency. A structured schedule keeps your outreach organized while giving prospects enough time to respond.
| Day | Activity |
|---|---|
| Day 1 | Send the initial personalized email. |
| Day 3 | Share a helpful resource or industry insight. |
| Day 7 | Provide a relevant customer example or case study. |
| Day 12 | Send a final follow-up asking whether the timing isn’t right or if another contact would be more appropriate. |
If a prospect replies at any stage, stop the automated sequence and continue the conversation personally.
Deliverability Checklist
Even well-written emails won’t perform if they never reach the inbox. Before launching a campaign, verify that:
✅ SPF records are configured.
✅ DKIM authentication is enabled.
✅ DMARC policy is active.
✅ Sending domains are verified.
✅ New email domains have been warmed up gradually.
✅ Invalid email addresses have been removed.
✅ Bounce rates are monitored regularly.
✅ Every email includes an easy way for recipients to opt out.
Protecting your sender reputation is essential for long-term outreach success.
Outreach Benchmarks
Instead of focusing only on email volume, evaluate how effectively your outreach generates qualified business conversations.
| KPI | Why It Matters |
|---|---|
| Delivery Rate | Confirms emails are reaching recipient servers. |
| Bounce Rate | Identifies list quality issues. |
| Reply Rate | Measures message relevance and prospect interest. |
| Positive Reply Rate | Indicates targeting and personalization quality. |
| Discovery Call Rate | Shows how many conversations progress to meetings. |
| Qualified Opportunity Rate | Measures pipeline quality instead of email activity. |
Review these metrics regularly to improve both targeting and messaging rather than simply increasing outreach volume.
Sales Insight
Cold email performs best when it feels like the beginning of a professional relationship rather than the start of a sales campaign.
Businesses that consistently achieve the strongest results usually prioritize research, personalization, and relevance over sending the highest number of emails. A carefully researched list of qualified prospects often generates more meaningful conversations than thousands of generic messages.
Treat every outreach email as an opportunity to provide value first. When prospects recognize that you’ve taken time to understand their business and communicate respectfully, they’re far more likely to respond positively and continue the conversation.
You have not enough Humanizer words left. Upgrade your Surfer plan.
Workflow Template #5: LinkedIn Lead Generation
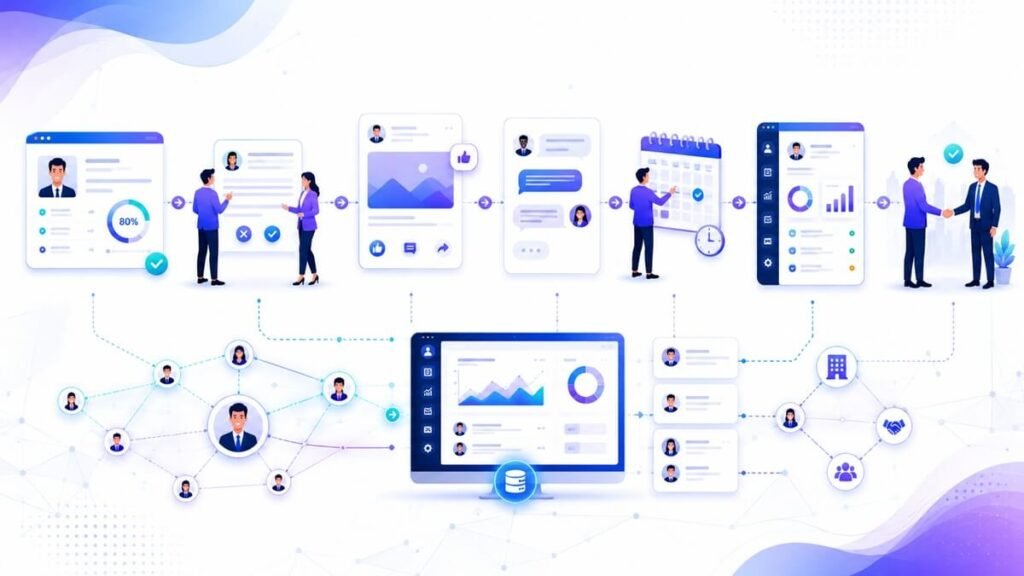
LinkedIn lead generation workflow showing how professional networking, valuable content, and personalized engagement turn connections into qualified business opportunities.
- Best for: B2B SaaS companies, agencies, consultants, recruiters, technology providers, enterprise sales teams, and professional service firms.
- Primary Goal: Establish credibility, build relationships with decision-makers, and create a consistent pipeline of qualified sales conversations.
Prospecting System
LinkedIn isn’t simply another place to send sales messages. It’s a professional networking platform where decision-makers evaluate your expertise before deciding whether to engage.
Unlike cold email, prospects can review your profile, read your content, examine your recommendations, and understand your experience before responding. Every interaction contributes to your professional reputation.
Successful LinkedIn lead generation focuses on creating familiarity over time. Instead of pushing for immediate meetings, the objective is to become someone prospects recognize as knowledgeable and trustworthy within your industry.
Step 1: Define Your Ideal Audience
Start by identifying the types of businesses and professionals you want to connect with. Consider characteristics such as:
- Industry
- Company size
- Geographic market
- Revenue range
- Business maturity
- Technology stack
- Operational challenges
Then identify the people most likely to influence purchasing decisions.
Common roles include:
- Founder
- CEO
- COO
- Marketing Director
- Sales Director
- Revenue Operations Manager
- IT Manager
- Operations Director
A clearly defined audience improves every stage of your outreach.
Step 2: Optimize Your Professional Profile
Before sending connection requests, make sure your own profile communicates value. Review each section carefully:
- Professional headline
- About section
- Work experience
- Featured content
- Recommendations
- Skills
- Profile photo
- Banner image
Ask yourself one question:
Would someone immediately understand who you help and why they should trust you?
Your LinkedIn profile often serves as the first impression of your business.
Step 3: Research Decision-Makers
Avoid connecting with people simply because they match your target industry. Instead, understand their business before reaching out.
Review:
- Company page
- Recent posts
- Hiring announcements
- Product launches
- Business milestones
- Shared connections
- Recent interviews or podcasts
These insights create natural conversation starters that feel relevant instead of scripted.
Step 4: Send Personalized Connection Requests
A connection request should explain why you’re interested in connecting.
Examples include:
- A recent article they published
- A shared industry challenge
- Mutual professional interests
- A conference or webinar you both attended
- A recent company achievement
Keep the message brief. The purpose is opening the door to future conversations rather than introducing your products immediately.
Step 5: Build Familiarity Through Engagement
After connecting, continue building trust before discussing business opportunities. Meaningful engagement may include:
- Commenting on their posts.
- Sharing thoughtful insights.
- Congratulating professional achievements.
- Recommending useful resources.
- Participating in industry discussions.
Consistent engagement helps prospects recognize your name long before your first direct message.
Step 6: Start Meaningful Conversations
Once you’ve established familiarity, begin a conversation naturally. Rather than presenting your services, focus on learning about their priorities.
Good conversation starters include:
- Industry trends.
- Business challenges.
- Operational improvements.
- Technology adoption.
- Professional experiences.
Treat every discussion as an opportunity to exchange ideas instead of making a sales presentation.
Step 7: Identify Business Opportunities
As conversations develop, determine whether your expertise aligns with the prospect’s needs.
Look for signals such as:
- Current operational challenges.
- Plans for growth.
- Interest in improving existing processes.
- Budget discussions.
- Requests for recommendations.
- Questions about implementation.
Listening carefully often reveals opportunities that aggressive selling would miss.
Step 8: Invite a Discovery Conversation
Once genuine interest exists, suggest a short meeting focused on exploring ideas rather than delivering a sales presentation. Explain what the discussion will cover and how it can help the prospect evaluate possible solutions.
Because trust has already been established through previous interactions, invitations at this stage generally feel collaborative instead of promotional.
Connection Strategy
Successful LinkedIn networking begins long before you click Connect.
| Connection Source | Recommended Approach |
|---|---|
| Industry Events | Mention the event or shared session. |
| Mutual Connections | Reference your shared contact naturally. |
| Shared Content | Comment before sending a request. |
| Company Research | Mention a recent achievement or announcement. |
| Professional Groups | Participate in discussions before reaching out. |
The strongest connection requests always provide context.
Message Framework
Keep direct messages simple and conversational. A practical structure is:
Greeting
↓
Personalized observation
↓
Relevant business insight
↓
Open-ended question
↓
Continue the conversation
Avoid lengthy introductions or feature-heavy product descriptions.
Engagement Timeline
Consistency matters more than volume.
| Week | Activity |
|---|---|
| Week 1 | Connect with a personalized invitation. |
| Week 2 | Engage with one or two posts. |
| Week 3 | Send a conversational message. |
| Week 4 | Share a useful article or industry resource. |
| Week 5+ | Invite a discovery call if genuine interest exists. |
This gradual approach builds familiarity without creating unnecessary pressure.
LinkedIn Dashboard
Measure relationship quality rather than the number of new connections.
| KPI | Why It Matters |
|---|---|
| Connection Acceptance Rate | Indicates invitation relevance. |
| Engagement Rate | Measures interaction with your content. |
| Conversation Rate | Tracks how many connections become discussions. |
| Discovery Call Rate | Shows progression toward sales opportunities. |
| Qualified Opportunity Rate | Measures business impact rather than networking activity. |
| Customer Conversion Rate | Connects LinkedIn efforts to revenue outcomes. |
Regularly reviewing these metrics helps identify which outreach strategies generate meaningful business conversations.
Networking Insight
LinkedIn rewards professionals who consistently contribute valuable ideas, engage respectfully, and build relationships over time. Instead of measuring success by the number of connection requests sent, focus on becoming a recognizable and trusted voice within your industry. Strong professional relationships often generate opportunities months after the initial connection, making LinkedIn one of the most effective long-term channels for B2B lead generation.
Workflow Template #6: Google Ads Lead Generation Workflow
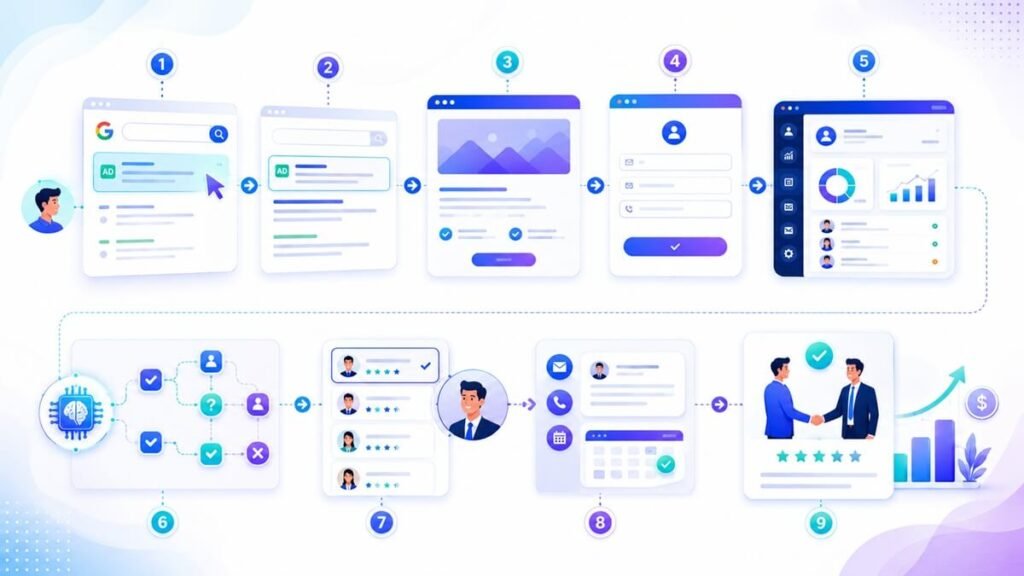
Google Ads lead generation workflow showing how high-intent search campaigns attract qualified prospects and convert advertising spend into measurable business opportunities.
- Best for: Service businesses, SaaS companies, agencies, consultants, healthcare providers, law firms, local businesses, and B2B organizations investing in paid search.
- Primary Goal: Capture high-intent prospects through Google Search and convert advertising traffic into qualified sales opportunities with optimized landing pages and fast follow-up.
Campaign Architecture
Google Ads is one of the few marketing channels where businesses can appear in front of potential customers precisely when they’re searching for a solution. Unlike social media advertising that creates demand, search advertising captures existing demand. Prospects already know they have a problem—they’re simply deciding which company can solve it.
Because every click costs money, every stage of the workflow must maximize conversion potential. Success depends not only on the advertisement but also on keyword selection, landing page relevance, lead handling, and campaign optimization.
The objective isn’t generating more clicks. It’s generating profitable customers.
Step 1: Build High-Intent Keyword Groups
Successful campaigns begin with keyword organization rather than advertisement design. Separate keywords into tightly themed ad groups so each advertisement closely matches the searcher’s intent.
Common categories include:
- Service-based searches
- Product comparisons
- Pricing-related keywords
- Local service searches
- Solution-specific searches
- Brand comparison keywords
Avoid combining unrelated keywords into the same campaign. Better organization improves Quality Score, click-through rate, and landing page relevance.
Step 2: Write Search Ads That Match Intent
Every advertisement should answer the searcher’s question immediately. An effective search ad should communicate:
- What you offer.
- Who it’s designed for.
- Why your solution stands out.
- What action visitors should take next.
Strengthen advertisements with relevant assets such as:
- Call extensions
- Location information
- Structured snippets
- Sitelinks
- Pricing information
- Customer ratings (when available)
Consistency between the keyword, advertisement, and landing page creates a smoother user experience and generally improves campaign performance.
Step 3: Create Dedicated Landing Pages
Never send paid traffic to a generic homepage. Instead, create landing pages specifically aligned with each advertising campaign. High-performing landing pages typically include:
- A headline matching the advertisement.
- A clear value proposition.
- Key customer benefits.
- Testimonials or case studies.
- Frequently asked questions.
- Trust signals.
- A simple lead form.
- One primary call to action.
Every section should reinforce the visitor’s original search intent and make taking the next step as easy as possible.
Step 4: Reduce Friction During Lead Capture
Your form should collect enough information to begin a conversation without discouraging conversions. For most campaigns, the following fields are sufficient:
- Name
- Business email
- Phone number
- Company
- Short project description
Long forms often reduce conversion rates unless the service requires detailed qualification. If additional information is needed, gather it during the consultation rather than on the first interaction.
Step 5: Respond While Intent Is Highest
Visitors searching Google are usually evaluating multiple providers. Fast follow-up increases the likelihood of continuing the conversation before competitors respond.
Your workflow should immediately:
- Confirm receipt of the inquiry.
- Notify the appropriate salesperson.
- Schedule follow-up tasks.
- Offer meeting availability.
- Record campaign attribution.
Reducing response time often has a greater impact on lead quality than increasing advertising spend.
Step 6: Qualify Opportunities
Not every form submission represents an ideal customer. Evaluate each inquiry using consistent qualification criteria such as:
- Business type
- Project scope
- Budget expectations
- Decision-making authority
- Timeline
- Geographic service area
Documenting these standards improves consistency across your sales team and helps prioritize high-value opportunities.
Step 7: Move Qualified Leads Into Sales
Once qualified, transition prospects into your structured sales process. Before the consultation, review:
- Original search keyword (when available).
- Advertisement clicked.
- Landing page submitted.
- Form responses.
- Previous interactions.
- Notes from qualification.
Having this context allows sales conversations to begin with the prospect’s needs rather than basic information gathering.
Landing Page Blueprint
Every Google Ads landing page should answer four questions within the first few seconds.
| Landing Page Element | Purpose |
|---|---|
| Clear Headline | Confirms visitors are in the right place. |
| Value Proposition | Explains why your solution is different. |
| Trust Signals | Builds confidence through reviews, testimonials, or certifications. |
| Primary CTA | Directs visitors toward one clear action. |
Removing unnecessary navigation and competing offers helps visitors stay focused on completing the desired action.
Budget Scaling
Increasing advertising spend doesn’t automatically increase profitability. Before raising your budget, confirm that:
- Existing campaigns consistently generate qualified leads.
- Landing pages convert efficiently.
- Sales teams respond quickly.
- Customer acquisition costs remain profitable.
- Conversion tracking is accurate.
Scale campaigns only after the workflow demonstrates reliable performance at smaller budgets.
Attribution Model
Understanding which campaigns generate revenue is more valuable than measuring clicks alone. Track the complete customer journey whenever possible.
| Marketing Stage | Data to Capture |
|---|---|
| Search Query | Original keyword or search intent |
| Advertisement | Campaign and ad group |
| Landing Page | Conversion page |
| Lead Source | Google Ads campaign |
| Sales Opportunity | Qualified pipeline value |
| Closed Customer | Revenue generated |
Accurate attribution helps identify which campaigns deserve additional investment.
ROAS Dashboard
Evaluate campaigns based on business outcomes instead of advertising activity.
| KPI | Why It Matters |
|---|---|
| Click-Through Rate (CTR) | Indicates advertisement relevance. |
| Conversion Rate | Measures landing page effectiveness. |
| Cost Per Lead (CPL) | Tracks acquisition efficiency. |
| Qualified Lead Rate | Measures lead quality rather than volume. |
| Cost Per Opportunity | Connects advertising spend to sales pipeline. |
| Return on Ad Spend (ROAS) | Evaluates overall campaign profitability. |
Reviewing these metrics together provides a more accurate picture than optimizing for clicks or impressions alone.
PPC Insight
The most successful Google Ads campaigns don’t win because they have the largest budgets—they win because every stage of the customer journey is aligned.
When keywords match advertisements, advertisements match landing pages, landing pages reduce friction, and sales teams respond quickly, paid search becomes far more than a traffic source. It becomes a predictable system for generating qualified opportunities and measurable business growth.up typically create stronger long-term results than businesses that focus only on lowering advertising costs.
Workflow Template #7: Facebook Lead Ads Workflow
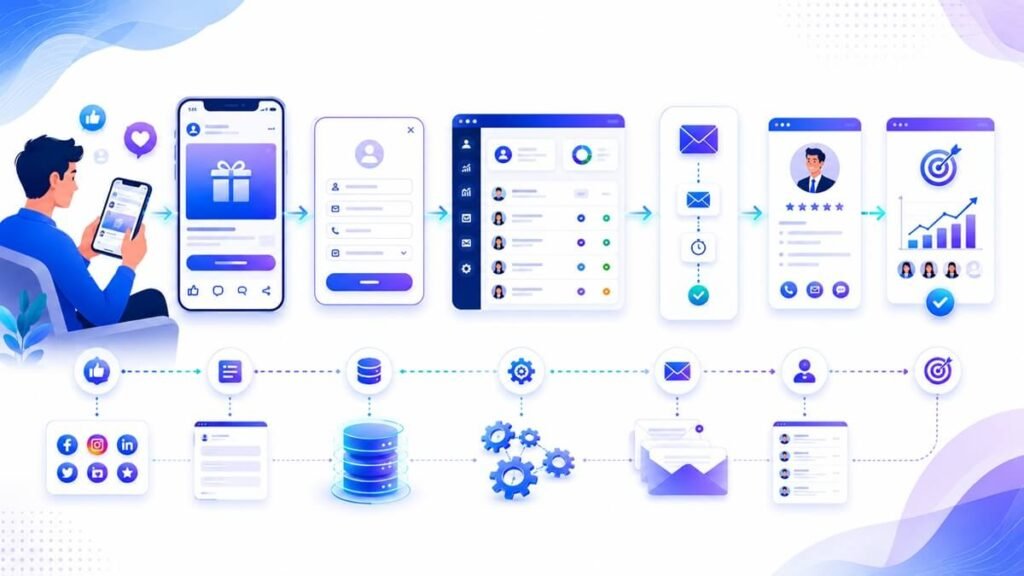
- Best for: Local businesses, healthcare providers, education, real estate, financial services, home services, coaches, and consumer-focused businesses.
- Primary Goal: Capture qualified leads directly within Facebook and Instagram while reducing friction during the signup process.
Why This Workflow Matters
Many people browse social media without intending to make an immediate purchase. However, they may still be interested in solving a problem, learning more about a service, or requesting additional information.
Facebook Lead Ads simplify this process by allowing users to submit their information without leaving the platform. Because many form fields are automatically populated, completing the form requires less effort than visiting an external website.
The result is often higher submission rates. However, higher lead volume doesn’t always mean higher lead quality. That’s why an effective workflow includes qualification, timely follow-up, and consistent nurturing—not just lead collection.
How the Workflow Works
Facebook / Instagram Ad
↓
Lead Form Opens
↓
User Submits Information
↓
CRM Integration
↓
Lead Qualification
↓
Instant Email / SMS
↓
Sales Assignment
↓
Consultation
↓
Qualified Opportunity
This workflow minimizes friction while ensuring every inquiry enters a structured follow-up process.
Step 1: Define Your Campaign Objective
Before creating advertisements, determine the specific business outcome you want to achieve. Common objectives include:
- Consultation requests
- Service estimates
- Event registrations
- Product demonstrations
- Newsletter subscriptions
- Free assessments
- Resource downloads
Each campaign should focus on one clear conversion goal. Avoid combining multiple objectives within the same campaign.
Step 2: Build a Relevant Audience
Audience quality has a direct impact on lead quality. Instead of targeting everyone, focus on people most likely to benefit from your offer.
Consider factors such as:
- Geographic location
- Interests
- Demographics
- Professional roles
- Existing customer lists
- Website visitors
- Lookalike audiences
As your campaigns generate more data, continue refining your audience based on actual conversion performance rather than clicks alone.
Step 3: Design a Simple Lead Form
One of the biggest advantages of Facebook Lead Ads is that many fields are pre-filled using information from the user’s profile.
That convenience reduces friction and often increases submission rates. However, asking too many questions can quickly offset this advantage. For most campaigns, your form should request only the information needed to begin a conversation, such as:
- First name
- Last name
- Business email
- Phone number
- Company name (for B2B)
- One qualifying question (optional)
Examples of useful qualifying questions include:
- What service are you interested in?
- How soon are you planning to start?
- Approximately how many employees does your company have?
- What is your biggest challenge today?
These questions help your sales team prioritize follow-up without overwhelming potential customers.
Step 4: Sync Every Lead to Your CRM
A lead should never remain inside Facebook alone. As soon as someone submits the form, automatically send the information to your CRM.
Record details such as:
- Campaign name
- Ad set
- Advertisement
- Date submitted
- Lead source
- Geographic location
- Assigned sales representative
- Initial status
Capturing this information allows you to measure which campaigns consistently generate qualified opportunities instead of simply producing high submission numbers.
Step 5: Respond Immediately
People often submit multiple inquiries while researching providers. An immediate response helps reinforce trust and confirms that your business received the request. A good first response generally includes:
- Thank-you message
- Confirmation that the inquiry was received
- Expected response time
- Helpful resource or FAQ
- Scheduling link (when appropriate)
Fast communication demonstrates professionalism while reducing uncertainty.
Step 6: Qualify the Lead
Facebook campaigns frequently generate leads at different stages of the buying journey. Some prospects are ready to purchase immediately. Others are simply gathering information.
Qualification helps determine:
- Business fit
- Budget expectations
- Timeline
- Decision-making authority
- Service requirements
The goal isn’t rejecting leads. It’s ensuring each person receives the most appropriate follow-up.
Step 7: Assign the Right Sales Representative
Assignment rules might depend on:
- Territory
- Industry
- Language
- Product specialization
- Existing customer relationships
- Team workload
Clear ownership prevents delays and eliminates confusion within the sales process.
Step 8: Continue Nurturing
Not every lead is ready today. Continue providing value through:
- Educational emails
- Helpful articles
- Customer success stories
- Webinar invitations
- Product updates
- Case studies
Consistent nurturing keeps your business visible until the prospect is ready to move forward.
Automation Opportunities
Facebook Lead Ads work especially well with automation.
Examples include:
- CRM creation
- Lead assignment
- Email confirmation
- SMS notifications
- Calendar scheduling
- Internal Slack or Teams alerts
- Lead scoring updates
- Pipeline reporting
Automation allows every inquiry to receive a consistent experience without increasing administrative work.
Common Mistakes
- Optimizing Only for Cheap Leads
- Weak Follow-Up
- Poor Audience Targeting
- No Qualification Process
- Ignoring Existing Customers
Key Metrics
| KPI | Why It Matters |
| Cost per Lead | Measures campaign efficiency. |
| Qualified Lead Rate | Indicates lead quality. |
| Contact Rate | Tracks successful follow-up. |
| Meeting Booking Rate | Measures sales progression. |
| Opportunity Rate | Shows pipeline creation. |
| Customer Acquisition Cost | Connects advertising investment to revenue. |
Implementation Checklist
Before launching:
- ✅ Audience defined
- ✅ Creative approved
- ✅ Lead form tested
- ✅ CRM connected
- ✅ Email automation configured
- ✅ Lead assignment rules active
- ✅ Tracking verified
- ✅ Dashboard created
Expert Recommendation
The easiest leads to collect aren’t always the best leads to pursue. Instead of asking, “How can we generate more leads?”, ask, “How can we generate more qualified conversations?” That mindset leads to better marketing decisions over time.
Workflow Template #8: Webinar Lead Generation Workflow
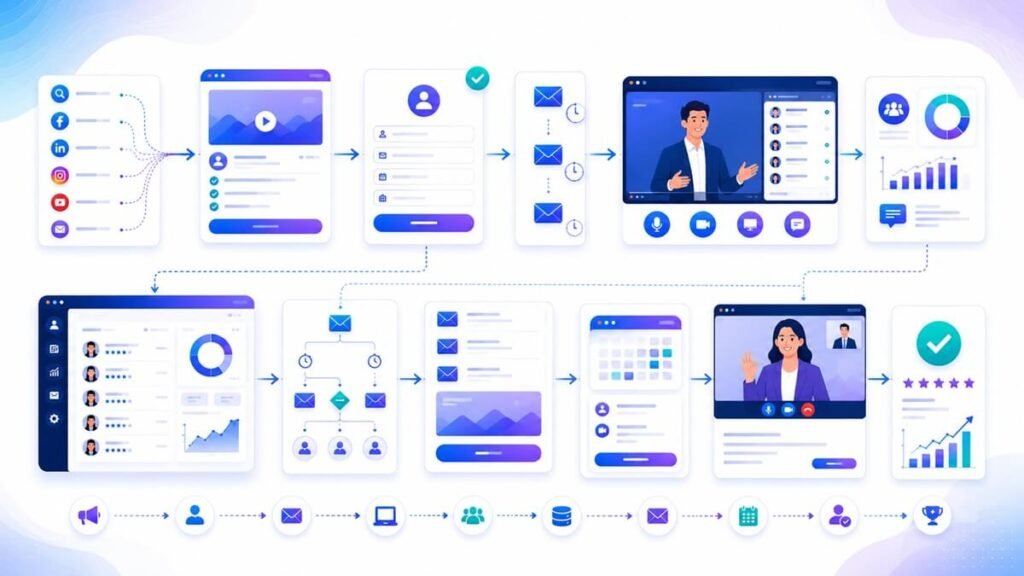
Lead generation webinar workflow showing how educational events build trust, engage prospects, and convert attendees into qualified sales opportunities.
- Best for: SaaS companies, consultants, agencies, enterprise software providers, educators, financial services, healthcare organizations, and B2B companies with longer sales cycles.
- Primary Goal: Educate potential customers, demonstrate expertise, and identify highly engaged prospects ready for sales conversations.
Registration Strategy
Webinars work because they give businesses something most marketing channels cannot—time. Instead of trying to explain a complex solution through a short advertisement or landing page, webinars allow you to educate prospects, answer questions, demonstrate real use cases, and establish credibility before discussing your products or services.
The quality of your webinar often determines the quality of your leads. People invest their time expecting practical knowledge, not a lengthy sales presentation. Successful webinars begin with one clearly defined business problem and promise a specific outcome that attendees can apply immediately.
Step 1: Choose One Practical Topic
Avoid broad presentations that try to cover everything. Instead, focus on solving one specific challenge.
Examples include:
- How to automate client onboarding
- Building an AI-powered sales workflow
- Reducing manual CRM updates
- Creating a revenue operations dashboard
- Improving customer retention through automation
Specific topics attract more qualified audiences because attendees know exactly what they’ll learn.
Step 2: Build a High-Converting Registration Page
Your registration page should quickly explain why the webinar is worth attending.
Include:
- Clear webinar title
- Short overview
- Learning outcomes
- Presenter credentials
- Date and time
- Estimated duration
- Registration form
Request only essential information to minimize friction during registration.
Step 3: Promote Across Multiple Channels
Don’t rely on a single traffic source.
Promote the webinar through:
- Email newsletters
- LinkedIn posts
- Company website
- Blog articles
- Social media
- Partner communities
- Paid advertising
- Existing customer lists
Using multiple promotion channels increases both reach and registration quality.
Step 4: Prepare the Presentation
Structure the webinar like a learning session rather than a product demonstration. A simple framework includes:
- Industry challenge
- Why existing approaches fail
- Practical solutions
- Live examples
- Best practices
- Questions and answers
- Next steps
Educational presentations consistently outperform product-heavy sales pitches.
Engagement Timeline
Maintaining engagement before, during, and after the webinar is just as important as attracting registrations.
| Timeline | Activity |
|---|---|
| Immediately After Registration | Confirmation email with calendar invitation. |
| One Week Before | Share useful background resources. |
| One Day Before | Reminder with webinar agenda. |
| One Hour Before | Final reminder and joining link. |
| During Webinar | Polls, demonstrations, and live Q&A. |
| Within 24 Hours | Send recording and presentation materials. |
A structured communication timeline significantly improves attendance and post-event engagement.
Attendance Optimization
Many registrants never attend live events. Improve attendance by removing common barriers. Effective strategies include:
- Offering multiple session times.
- Sending calendar invitations.
- Keeping sessions between 30–60 minutes.
- Starting on time.
- Providing downloadable resources.
- Encouraging live questions.
- Using interactive polls throughout the presentation.
Small improvements in attendance rates often generate significantly more qualified opportunities without increasing advertising spend.
Replay Campaign
The webinar shouldn’t end when the live session finishes. Create a structured replay campaign for different audience segments.
| Audience | Follow-Up |
|---|---|
| Live Attendees | Consultation invitation and additional resources. |
| Registered but Absent | Webinar recording with key takeaways. |
| Highly Engaged Participants | Personalized follow-up from sales. |
| Existing Customers | Advanced implementation resources. |
| New Subscribers | Educational email sequence related to the webinar topic. |
Repurposing webinar content extends its value long after the live presentation.
Webinar KPIs
Evaluate webinars based on business outcomes rather than registration numbers alone.
| KPI | Why It Matters |
|---|---|
| Registration Rate | Measures promotional effectiveness. |
| Attendance Rate | Indicates audience commitment. |
| Average Watch Time | Reflects presentation quality. |
| Audience Engagement | Measures polls, questions, and interactions. |
| Discovery Call Rate | Tracks progression into sales conversations. |
| Pipeline Revenue | Connects webinar performance to business growth. |
Monitoring these metrics helps identify where improvements will have the greatest impact.
Marketing Insight
A successful webinar doesn’t feel like a sales presentation—it feels like a valuable educational experience.
When attendees leave with practical knowledge they can immediately apply, they naturally begin viewing your business as a trusted advisor rather than another vendor. That trust makes future sales conversations easier, improves conversion rates, and allows a single webinar to continue generating qualified opportunities through recordings, follow-up campaigns, and repurposed content long after the live event ends.
You have not enough Humanizer words left. Upgrade your Surfer plan.tinue the conversation naturally instead of repeating introductory questions.
Workflow Template #9: AI SDR (Sales Development Representative) Workflow
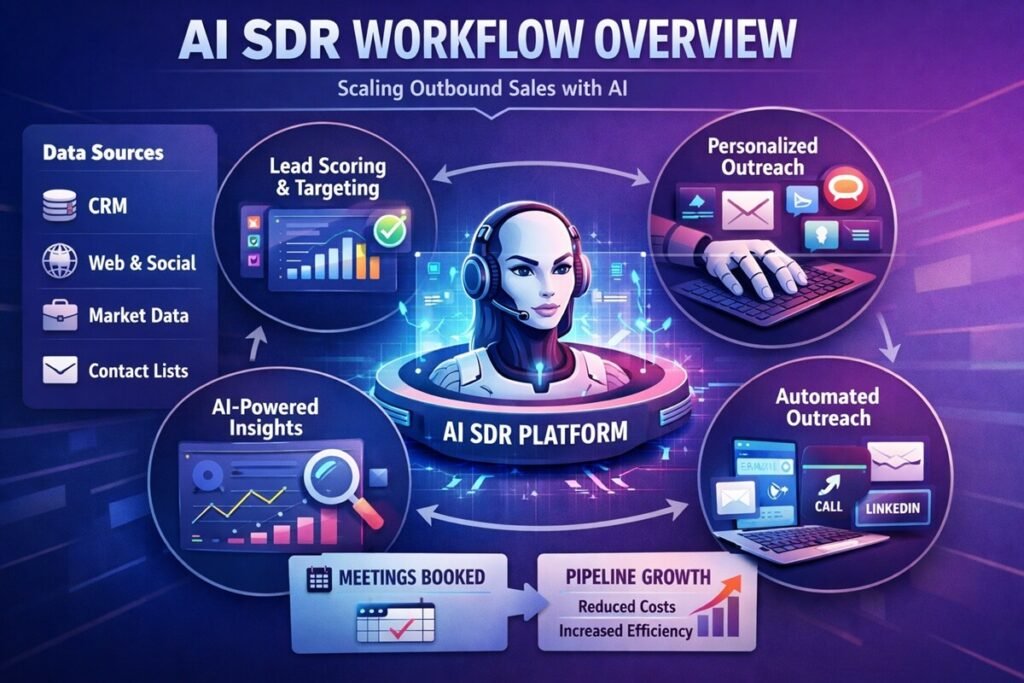
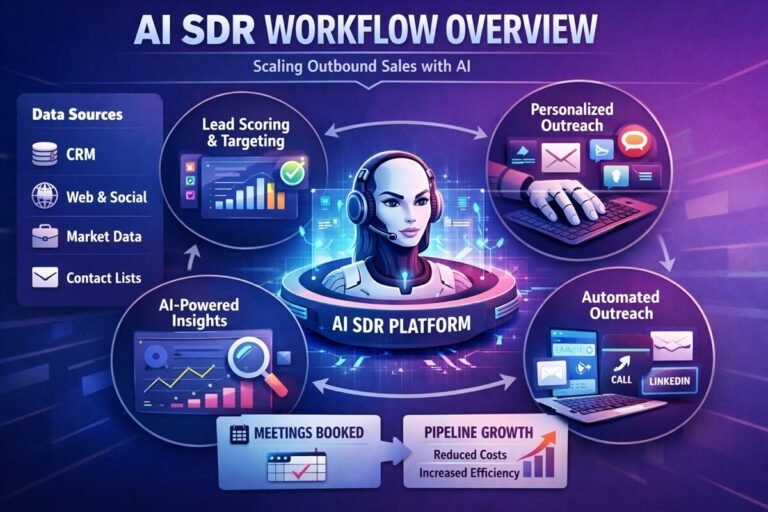
AI SDR workflow showing how artificial intelligence researches prospects, prioritizes opportunities, assists with outreach, and supports sales representatives throughout the qualification process.
- Best for: B2B SaaS companies, agencies, enterprise software providers, technology companies, managed service providers (MSPs), and organizations with high-volume outbound sales.
- Primary Goal: Use AI to automate repetitive sales development activities while allowing human representatives to focus on building relationships and closing qualified opportunities.
AI Decision Model
Artificial intelligence is changing how modern sales teams identify and engage potential customers. Instead of spending hours researching companies, organizing CRM records, or writing repetitive outreach messages, AI can complete many of these tasks in minutes.
The objective isn’t replacing sales representatives. Instead, AI acts as an intelligent assistant that gathers information, identifies patterns, recommends priorities, and prepares outreach while people remain responsible for conversations, negotiations, and relationship building.
Organizations that combine AI with experienced sales professionals typically achieve greater efficiency without sacrificing personalization.
Step 1: Collect Lead Data
AI workflows begin with reliable data. Leads may originate from:
- Website inquiries
- Content downloads
- LinkedIn campaigns
- Google Ads
- Facebook Lead Ads
- Webinar registrations
- Referral programs
- Partner websites
Capturing every lead in a centralized CRM gives AI a consistent source of information for analysis and prioritization.
Step 2: Enrich Company Profiles
Once a lead enters the system, AI can gather publicly available business information.
Examples include:
- Industry
- Employee count
- Company size
- Headquarters location
- Technology stack
- Website information
- Recent business news
- Funding announcements
Enriched profiles provide additional context before sales representatives begin conversations.
Step 3: Analyze Buying Signals
Instead of treating every lead equally, AI evaluates available information to identify purchasing intent. Signals should include:
- Multiple website visits
- Pricing page activity
- Resource downloads
- Webinar attendance
- Email engagement
- Company growth indicators
- Recent hiring activity
These behavioral signals help prioritize leads that are more likely to convert.
Step 4: Prepare Personalized Outreach
Using available research, AI can draft communication tailored to each prospect.
Common examples include:
- Introduction emails
- Follow-up messages
- LinkedIn connection requests
- Meeting invitations
- Conversation summaries
Every draft should be reviewed before sending to ensure accuracy, compliance, and a natural tone.
Step 5: Prioritize Sales Activities
Instead of working through leads randomly, AI recommends which prospects deserve immediate attention. Recommendations may consider:
- Buying intent
- Engagement history
- Company fit
- Previous conversations
- Lead score
- Sales pipeline stage
Prioritization allows sales representatives to spend more time on opportunities with the greatest likelihood of success.
Lead Scoring Logic
AI lead scoring combines multiple data points to estimate sales readiness.
| Buying Signal | Influence on Priority |
|---|---|
| Pricing Page Visits | High |
| Webinar Attendance | High |
| Multiple Content Downloads | Medium |
| Email Engagement | Medium |
| Company Growth Activity | Medium |
| Single Website Visit | Low |
Lead scores should support decision-making rather than replace professional judgment.
Human Review
AI can accelerate research and recommendations, but people remain responsible for important sales decisions. Human review is especially valuable when:
- Reviewing high-value accounts.
- Approving personalized outreach.
- Confirming qualification decisions.
- Handling complex objections.
- Negotiating contracts.
- Building long-term customer relationships.
The strongest AI SDR systems combine automation with human expertise instead of replacing it.
Continuous Learning
AI becomes more effective as it receives feedback from real sales outcomes.
Regular improvements include:
- Updating ideal customer profiles.
- Refining lead scoring criteria.
- Improving outreach prompts.
- Learning from successful conversations.
- Removing outdated qualification rules.
- Monitoring conversion trends.
Continuous optimization ensures recommendations remain aligned with changing customer behavior and business objectives.
AI Dashboard
Track business outcomes instead of automation activity alone.
| KPI | Why It Matters |
|---|---|
| Lead Processing Time | Measures operational efficiency. |
| Lead Enrichment Accuracy | Evaluates research quality. |
| Sales Acceptance Rate | Indicates AI recommendation quality. |
| Qualified Opportunity Rate | Measures pipeline effectiveness. |
| Meetings Scheduled | Tracks progression into the sales process. |
| Pipeline Revenue | Connects AI workflows to measurable business growth. |
These metrics help determine whether AI is creating meaningful improvements rather than simply increasing automation.
AI Expert Insight
The most successful AI SDR implementations don’t attempt to replace experienced sales professionals—they remove the repetitive work that prevents them from spending time with customers.
When AI handles research, prioritization, and administrative tasks, sales teams can focus on understanding business challenges, providing strategic guidance, and building stronger relationships. The result is a workflow where automation improves speed and consistency while human expertise continues to drive trust, collaboration, and long-term revenue growth.tions.
Workflow Template #10: AI Chatbot Lead Generation Workflow
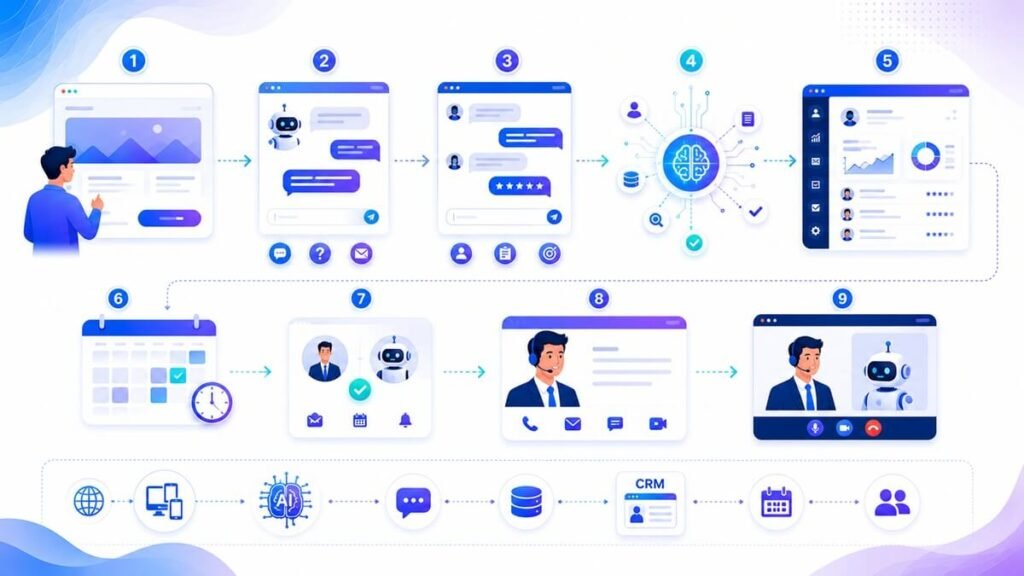
AI chatbot workflow showing how intelligent website conversations answer visitor questions, qualify prospects, and connect them with the right sales or support team.
- Best for: SaaS companies, agencies, eCommerce businesses, service providers, educational organizations, healthcare providers, and businesses receiving significant website traffic.
- Primary Goal: Engage website visitors instantly, provide helpful answers, qualify leads, and route conversations to the appropriate team without unnecessary delays.
Conversation Design
Visitors often leave websites with unanswered questions because finding information takes too much effort. An AI chatbot removes that friction by providing immediate assistance exactly when someone is interested.
Unlike traditional live chat, AI assistants can answer common questions around the clock, recommend relevant resources, and recognize when a visitor needs human assistance.
The objective isn’t replacing your sales or support team. It’s creating faster, more helpful conversations that guide visitors toward the next logical step while allowing employees to focus on higher-value interactions.
Step 1: Understand Visitor Intent
Before building conversation flows, identify why people visit your website. Common objectives include:
- Learning about products or services
- Comparing solutions
- Requesting pricing
- Booking a consultation
- Finding technical documentation
- Contacting customer support
- Tracking an existing request
- Exploring integrations
Design conversations around these real user goals rather than generic greetings.
Step 2: Build Intent-Based Conversations
Different visitors require different experiences. Create separate conversational paths for:
- Sales inquiries
- Customer support
- Product demonstrations
- Technical documentation
- Partnership opportunities
- Billing questions
- Existing customers
- New prospects
Clear conversation paths reduce confusion and improve response accuracy.
Step 3: Capture Helpful Information
Instead of presenting lengthy forms, gather information naturally throughout the conversation. Useful questions may include:
- Company name
- Industry
- Team size
- Primary challenge
- Product of interest
- Preferred contact method
- Implementation timeline
Collect only information that improves the visitor experience or supports better follow-up.
Step 4: Recommend Helpful Resources
Many visitors can solve their questions without waiting for a representative. Depending on the conversation, recommend:
- Knowledge base articles
- Product documentation
- Video tutorials
- Case studies
- Webinar recordings
- Buying guides
- Implementation checklists
Providing immediate answers improves customer satisfaction while reducing repetitive support requests.
Step 5: Route Conversations Intelligently
Once the chatbot understands the visitor’s intent, direct them to the appropriate department.
Examples include:
- Sales representatives
- Technical support
- Customer success
- Billing specialists
- Business development
- Marketing
Smart routing reduces response times and improves the overall customer experience.
Qualification Questions
Not every visitor needs the same follow-up. Ask only a few questions that help determine the next step.
| Visitor Goal | Example Question |
|---|---|
| Product Demo | Which product are you interested in? |
| Sales Inquiry | What challenge are you trying to solve? |
| Technical Support | Which product are you currently using? |
| Existing Customer | Can you share your account email? |
| Partnership Request | Tell us about your organization. |
Short, relevant questions feel conversational while providing valuable context.
Human Handoff
AI should recognize when a conversation requires human expertise. Transfer conversations immediately when visitors need:
- Contract discussions
- Enterprise pricing
- Complex technical troubleshooting
- Complaint resolution
- Security or compliance questions
- Custom implementation advice
A smooth handoff allows representatives to continue the discussion without asking visitors to repeat information.
Chat Scripts
Consistency helps create a better customer experience.
| Scenario | Recommended Response |
|---|---|
| Greeting | Welcome the visitor and ask how you can help. |
| Product Question | Provide a concise answer with supporting resources. |
| Pricing Inquiry | Share pricing information or connect with sales. |
| Support Request | Gather basic details before routing to support. |
| Meeting Request | Offer available scheduling options. |
| Unknown Question | Escalate to a human representative. |
Scripts should provide guidance while remaining flexible enough to support natural conversations.
Support Dashboard
Monitor chatbot performance using customer-focused metrics.
| KPI | Why It Matters |
|---|---|
| Chat Engagement Rate | Measures visitor participation. |
| Resolution Rate | Indicates how many questions AI answers successfully. |
| Qualified Lead Rate | Tracks sales opportunities generated. |
| Human Handoff Rate | Measures conversations requiring human assistance. |
| Average Response Time | Evaluates customer experience. |
| Customer Satisfaction (CSAT) | Reflects overall conversation quality. |
Reviewing these metrics regularly helps improve both automation performance and visitor satisfaction.
CX Insight
An AI chatbot shouldn’t try to imitate a salesperson—it should function as a knowledgeable digital assistant that helps visitors find answers quickly and confidently.
When conversations are designed around real customer needs, AI becomes more than a support tool. It reduces response times, improves lead qualification, enhances customer satisfaction, and ensures every visitor receives the right level of assistance at the right moment.
Workflow Template #11: Lead Qualification Workflow
- Best for: Every business generating inbound or outbound leads.
Lead qualification workflow showing how businesses evaluate, score, prioritize, and route incoming leads to maximize sales efficiency and revenue growth.
- Best for: Every business generating inbound or outbound leads.
- Primary Goal: Identify which leads deserve immediate sales attention and which should continue through marketing or nurturing until they’re ready to buy.
Qualification Framework
Generating leads is only the beginning of the sales process. The real challenge is determining which prospects are ready for meaningful conversations and which require additional education before speaking with sales.
Without a structured qualification process, sales representatives often spend valuable time pursuing opportunities that are unlikely to convert while highly qualified prospects wait for responses.
An effective qualification framework ensures every lead follows the most appropriate path based on business fit, buying intent, and engagement rather than guesswork or personal judgment.
Step 1: Verify Essential Information
Before evaluating a lead, confirm that the submitted information is complete and accurate. Review details such as:
- Contact name
- Business email
- Company name
- Job title
- Lead source
- Geographic location
Accurate information creates a stronger foundation for every future interaction.
Step 2: Measure Business Fit
Determine whether the organization aligns with your Ideal Customer Profile (ICP).
Evaluate factors including:
- Industry
- Company size
- Geographic service area
- Budget range
- Product or service fit
- Technical requirements
A lead that doesn’t match your target market may still benefit from educational content, but it shouldn’t automatically enter the sales pipeline.
Step 3: Assess Buying Intent
Demographics alone rarely predict purchase readiness. Instead, review behavioral indicators such as:
- Pricing page visits
- Product comparisons
- Demo requests
- Webinar attendance
- Implementation guide downloads
- Multiple website sessions
- Replies to marketing emails
Behavior often provides stronger buying signals than company size or job title.
Step 4: Assign Priority Levels
After qualification, categorize leads using consistent priority levels. General classifications include:
High Priority
Strong business fit with immediate buying intent.
Medium Priority
Good fit but requires additional education or follow-up.
Low Priority
Limited buying signals or early research stage.
Consistent prioritization helps sales teams focus on opportunities with the greatest revenue potential.
Step 5: Route Leads to the Correct Path
Every qualified lead should move into a clearly defined workflow.
Possible destinations include:
- Sales pipeline
- Marketing nurture campaign
- Customer success team
- Partner referral
- Future follow-up sequence
Routing rules create consistency while ensuring every prospect receives an appropriate experience.
Scoring Matrix
Lead scoring provides an objective way to prioritize opportunities.
| Qualification Factor | Score |
|---|---|
| Matches Ideal Customer Profile | High |
| Strong Buying Intent | High |
| Requested Product Demo | High |
| Multiple Content Downloads | Medium |
| Webinar Attendance | Medium |
| General Website Visit | Low |
Scores should guide prioritization rather than replace professional judgment.
Decision Tree
A structured decision process keeps qualification consistent across the organization.
| Lead Status | Recommended Action |
|---|---|
| Excellent Fit + High Intent | Assign immediately to sales. |
| Good Fit + Moderate Intent | Continue personalized nurturing. |
| Good Fit + Low Intent | Deliver educational resources. |
| Poor Fit | Archive or refer when appropriate. |
| Incomplete Information | Request additional details before qualification. |
Clear routing decisions reduce delays and prevent opportunities from being overlooked.
Pipeline Dashboard
Monitor qualification quality using revenue-focused metrics.
| KPI | Why It Matters |
|---|---|
| Marketing Qualified Leads (MQLs) | Measures marketing effectiveness. |
| Sales Qualified Leads (SQLs) | Indicates sales readiness. |
| Sales Acceptance Rate | Evaluates qualification accuracy. |
| Opportunity Creation Rate | Tracks pipeline growth. |
| Win Rate | Measures conversion quality. |
| Average Sales Cycle | Indicates pipeline efficiency. |
Reviewing these metrics together provides a more complete view of sales performance than lead volume alone.
Optimization Strategy
Lead qualification should evolve as customer behavior changes. Review your qualification framework regularly by:
- Updating your Ideal Customer Profile.
- Refining lead scoring rules.
- Analyzing closed-won and closed-lost opportunities.
- Removing qualification questions that add little value.
- Improving routing based on conversion data.
- Aligning sales and marketing feedback.
Small improvements in qualification accuracy often produce significant increases in sales productivity.
Revenue Insight
The purpose of lead qualification isn’t to reject prospects—it’s to match every prospect with the right experience at the right stage of their buying journey.
Organizations that consistently evaluate business fit, buying intent, and engagement before assigning sales resources typically build healthier pipelines, shorten sales cycles, improve conversion rates, and generate more predictable revenue growth from the same volume of leads.
Rather than focusing on a single KPI, evaluate the entire customer journey. Businesses that optimize each stage—from lead generation and qualification to sales conversion and customer retention—consistently achieve stronger long-term growth than those measuring lead volume alone.
You have not enough Humanizer words left. Upgrade your Surfer plan.ding whether you can genuinely help the prospect—not persuading every lead to become a customer. That mindset builds trust while improving long-term sales performance.
Essential Metrics to Measure
Implementing a workflow is only the beginning. To improve results over time, you need to measure how well each stage of the process performs.
Some of the most useful metrics include:
| Metric | Why It Matters |
| Website Conversion Rate | Measures how effectively visitors become leads. |
| Cost per Lead (CPL) | Evaluates marketing efficiency. |
| Marketing Qualified Leads (MQLs) | Indicates lead quality from marketing. |
| Sales Qualified Leads (SQLs) | Shows how many leads are ready for sales. |
| Opportunity Rate | Tracks progression through the sales pipeline. |
| Customer Acquisition Cost (CAC) | Measures the cost of acquiring a customer. |
| Customer Lifetime Value (CLV) | Estimates the long-term value of each customer. |
| Lead Response Time | Measures operational efficiency. |
| Meeting Booking Rate | Indicates sales engagement. |
| Win Rate | Tracks successful conversions into customers. |
Instead of focusing on one metric in isolation, review your entire funnel. A campaign that generates fewer leads but a higher conversion rate may contribute more revenue than one producing a large number of low-quality inquiries.
Common Lead Generation Workflow Mistakes
Even well-designed workflows can underperform if common mistakes go unnoticed. Here are some of the issues businesses frequently encounter.
Automating Broken Processes
Automation improves efficiency, but it cannot fix an ineffective process. Before introducing automation, ensure your workflow is clear, documented, and producing reasonable results manually.
Slow Follow-Up
Lead quality decreases quickly when inquiries wait too long for a response. Establish service-level agreements (SLAs) for response times and use automation to notify the appropriate team members immediately.
Poor CRM Hygiene
Duplicate records, outdated contact information, and inconsistent data make reporting less reliable and reduce sales productivity. Regular CRM maintenance is just as important as generating new leads.
Focusing on Quantity Instead of Quality
More leads do not always mean more customers. Evaluate campaigns based on qualified opportunities, revenue, and customer retention rather than submission volume alone.
Weak Alignment Between Marketing and Sales
Marketing may define success as generating leads, while sales focuses on closing customers. Shared qualification criteria, regular communication, and common reporting help both teams work toward the same business objectives.
Ignoring Existing Customers
Many organizations invest heavily in acquiring new leads while overlooking opportunities within their existing customer base. Satisfied customers often become repeat buyers, advocates, and referral sources.
Best Practices for Building High-Performing Lead Generation Workflows
The following principles apply regardless of the tools or platforms you choose.
- Start with a clearly defined Ideal Customer Profile (ICP).
- Keep forms as short as practical.
- Respond to new inquiries promptly.
- Store all lead data in a centralized CRM.
- Personalize communication whenever possible.
- Review workflow performance regularly.
- Test one improvement at a time.
- Maintain accurate CRM records.
- Prioritize user experience over unnecessary automation.
- Continue educating prospects even if they are not ready to buy today.
The strongest workflows evolve over time. Review your processes regularly, gather feedback from your sales and marketing teams, and make incremental improvements based on real performance data.
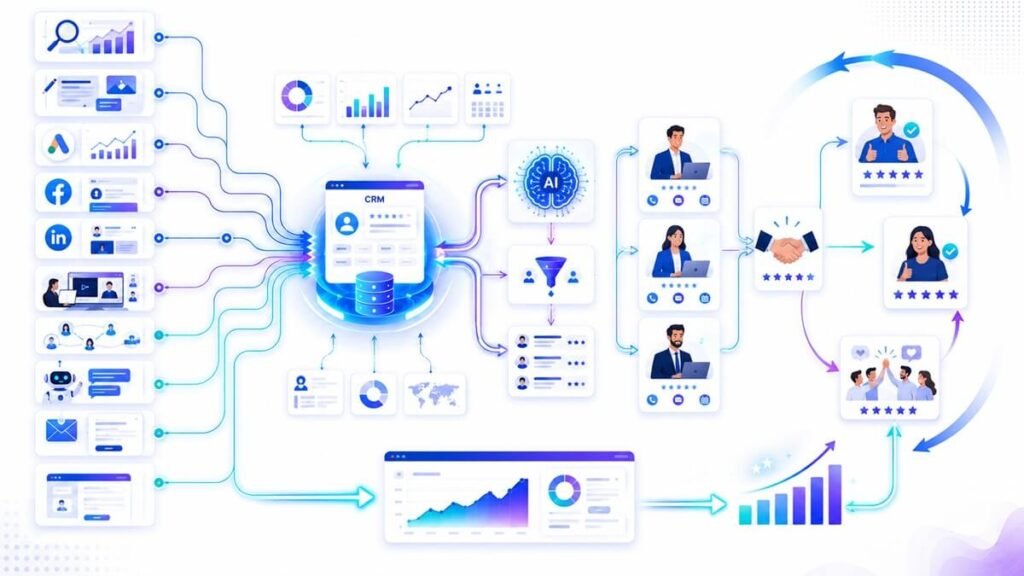
Frequently Asked Questions
What is a lead generation workflow?
A lead generation workflow is a structured process that guides potential customers from their first interaction with your business through qualification, follow-up, and eventually into your sales pipeline. Workflows help ensure that every lead receives timely and consistent communication.
Why are lead generation workflows important?
Without a defined workflow, leads can be missed, follow-ups may become inconsistent, and valuable sales opportunities can be lost. A documented process improves efficiency, collaboration, and the customer experience.
Can small businesses benefit from lead generation workflows?
Yes. Even a simple workflow that captures inquiries, stores them in a CRM, and sends automatic follow-up emails can improve consistency and reduce manual work of small businesses.
Which workflow should I implement first?
Most businesses benefit from starting with a website contact form workflow or a content marketing workflow. Once those processes are working reliably, you can expand into additional channels such as LinkedIn, Google Ads, webinars, or AI-assisted sales development.
Do I need AI to build an effective workflow?
No. AI can help automate repetitive tasks such as lead enrichment, email drafting, or conversation summaries, but the foundation of an effective workflow is a clear process, timely follow-up, and helpful communication.
How often should I review my workflows?
Review key performance metrics at least once a month and conduct a more detailed audit each quarter. Regular reviews help identify bottlenecks, outdated automation, and opportunities for improvement.
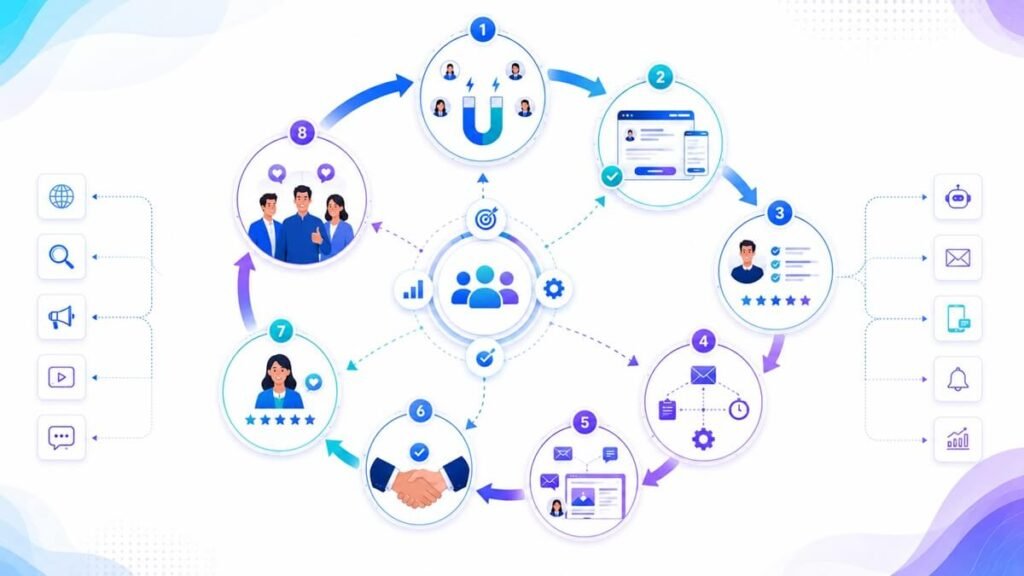
Final Thoughts
Lead generation isn’t about collecting as many contacts as possible. It’s about building a reliable system that helps the right people discover your business, learn from your expertise, and move confidently toward becoming customers.
The workflows in this guide demonstrate that successful lead generation is rarely the result of a single tactic. Instead, it comes from connecting multiple processes—capturing leads, qualifying opportunities, automating repetitive tasks, and delivering timely, relevant follow-up.
Start with one workflow that addresses your biggest challenge today. Document each step, measure your results, and refine the process as you learn. As your business grows, you can expand your system by adding additional workflows that support new channels, products, or customer segments.
Ultimately, the most effective lead generation workflow is the one that consistently delivers value to your audience while helping your team build stronger, more meaningful customer relationships.